

There’s something so lovely about a Peach Galette that just makes summer feel even sweeter. This rustic dessert is not only beautiful, but it’s also a breeze to whip up! The scent of warm peaches mixed with buttery pastry always fills my kitchen with a homey vibe.
This recipe solves busy cooks’ dessert cravings by offering a quick, approachable pie-like treat using simple ingredients, easy crust, minimal equipment, and reliable fruit filling.

I used to be scared of making pie, worried I’d mess it up and end up with a soggy crust. But this galette takes away that fear. It’s simple and forgiving, so even if you’re new to baking, you can feel confident that it’ll turn out delicious!
This recipe comes together in about 45 minutes of prep time and about 50 minutes of baking, making it a great option for a warm, homemade treat without spending the whole day in the kitchen. Plus, using fresh peaches really boosts the flavor, and you can even use frozen or canned if you want to skip the peeling.
If you love peach desserts, you might also enjoy this Peach Jam. It’s a tasty way to enjoy peaches in a whole new way!
Why You Will Love This Recipe
- Fresh Flavor : The use of ripe peaches makes this galette bursting with sweet and juicy flavor, bringing a taste of summer right to your kitchen.
- Rustic Appeal : Its imperfect, homemade look is part of the charm. No fussing over perfect shapes here, just a beautiful, rustic dessert.
- Convenient Prep : Minimal fuss in preparation means you can whip this up in no time. It’s an easy dessert that won’t take over your day.
- Make-Ahead Storage : Leftovers are easy to store in the fridge for a few days. Just reheat to keep that flaky crust nice and crispy.

Easy Peach Galette Recipe
- Prep Time: 45 minutes
- Cool Time: 2 hours
- Cook Time: 50 minutes
- Total Time: 3 hours 35 minutes
- Yield: 8 slices 1x
- Category: dessert
- Method: Baking
- Cuisine: American
- Diet: Vegetarian
Description
A delicious and easy-to-make Peach Galette that is perfect for summer gatherings.
Ingredients
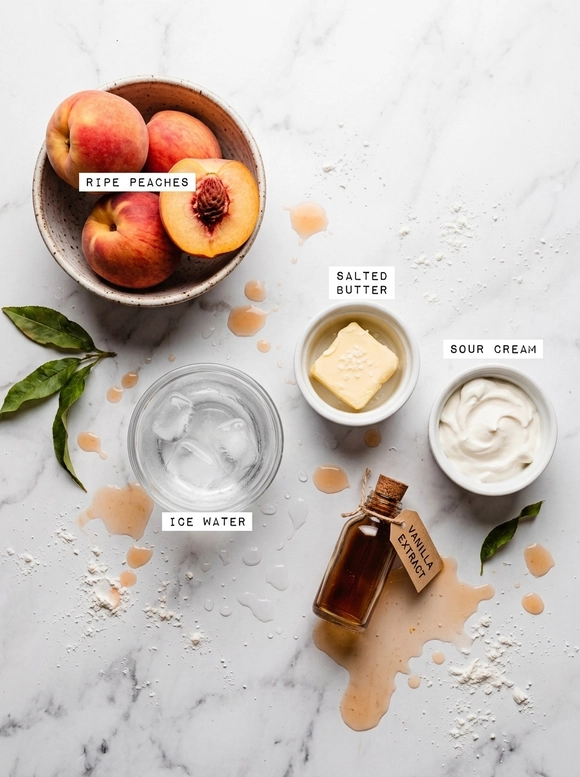
- 1 and 1/4 cups (163 grams) all-purpose flour, spooned & leveled or weighed out
- 3/4 tsp salt
- 1 tsp granulated sugar
- 1/2 cup (113 grams) cold salted butter, cubed
- 1/4 cup (60 grams) cold, full-fat sour cream
- 3 to 5 tbsp (45 to 75 grams) ice cold water
- 6–7 medium peaches (713 grams after being sliced)
- 1/3 cup (80 grams) light brown sugar, packed
- 2 tbsp (16 grams) all-purpose flour
- 1 and 1/4 tsp cinnamon
- 1/4 tsp nutmeg
- 1 and 1/2 tsp vanilla extract
- 1 tsp lemon juice
- 1 large egg
- raw sugar, for sprinkling
Instructions
- Preheat & Prepare Baking Sheet: Start by preheating your oven to 375 degrees F. While that is happening, grab a baking sheet and line it with parchment paper. This will help with easy cleanup later.
- Roll Out the Dough: Take your chilled pie dough and roll it out into a rough circle on a floured surface. You want it about an eighth of an inch thick; it should look smooth and feel pliable. The key here is not to overwork it, or your crust could turn out tough.
- Arrange the Peach Filling: Lay down your sliced peaches right in the center of the dough. Make sure to leave a border around the edges. Remember to leave any excess juice behind to prevent a soggy filling.
- Fold the Edges: Gently fold the edges of the dough over the filling, pinching to create a rustic look. Just ensure that you do not fold too far over the peaches; they still need room to breathe and cook through.
- Brush & Sprinkle Topping: Brush the crust with a bit of egg wash to get it shining in the oven. Sprinkle some raw sugar on top for added crunch and sweetness without overshadowing the natural flavors of the peaches.
- Bake Until Golden: Bake the galette until the crust is golden and the peaches are bubbly, about 50 minutes. If the edges start to brown too quickly, cover them with foil to prevent burning.
- Let It Cool: Once done baking, take it out and let it cool slightly on the sheet. Avoid cutting it too early to prevent a messy situation; let the filling settle as it cools.
Notes
- Storage Tips: Store leftovers in an airtight container in the fridge for 2-3 days. Reheat slices in the oven to maintain crust crispness.
- Expert Tips: Chill the pie dough for at least 2 hours for best results. Use a metal pan to ensure even baking of the galette. If using frozen peaches, do not thaw them before adding to the filling.
- Troubleshooting: If the crust feels tough after baking, ensure you used cold ingredients and did not overwork the dough during preparation. When the peach filling looks too watery, try using thicker slices and make sure to drain any excess liquid before assembling. Cover the edges with foil during baking if they brown too quickly.
- Reheating Instructions: Reheat slices in a preheated oven at 375 degrees F for about 10 minutes for the best texture.
- Serving Suggestions: Serve warm with a scoop of vanilla ice cream or pair with whipped cream for a light finish. Enjoy with a dollop of yogurt for breakfast.
- Recipe Variations: Replace peaches with nectarines for variation. Incorporate other spices like cardamom for unique depth.
Nutrition
- Serving Size: 1 slice
- Calories: 290
- Sugar: 19g
- Sodium: 338mg
- Fat: 14g
- Saturated Fat: 8g
- Unsaturated Fat: 6g
- Trans Fat: 0g
- Carbohydrates: 38g
- Fiber: 2g
- Protein: 4g
- Cholesterol: 58mg
Recipe Tips
- If crust feels tough after baking, check that you used cold ingredients and didn’t overwork the dough during preparation.
- When the peach filling looks too watery, try using thicker slices and make sure to drain any excess liquid before assembling.
- For a uniformly baked galette, using a metal pan is a great way to achieve even heat distribution.
- If the edges brown too quickly, covering them with foil can help prevent burning while the filling cooks through.
- When using frozen peaches, it’s best not to thaw them before adding them to the mix to maintain their texture.
Serving Suggestions
Enjoy a warm peach galette with a scoop of vanilla ice cream or a dollop of whipped cream. For breakfast, pair it with yogurt or serve it alongside fresh fruit.
This galette can also serve as a base for other desserts, such as fruit salads or as a topping for oatmeal. You might try using it in a layered dessert with gluten-free cake or as a filling for gluten-free crepes.
Recipe variations
- You can use blueberries instead of peaches for a refreshing alternative, resulting in a delightful berry galette that brightens up your dessert table.
- Add 1 tsp of almond extract if you’re looking for a nutty flavor that pairs perfectly with the sweetness of the fruit.
- Either sprinkle in some cardamom for a unique twist or use a combination of cinnamon and cloves to add a different spice profile.
- If you’re making a larger galette, increase the flour to 1 and 3/4 cups and use 10 medium peaches to maintain 713 grams after slicing.
Save This Recipe!

How to Store?
To keep your peach galette fresh, follow these storage tips:
Refrigeration: Store slices in an airtight container in the fridge for up to 3 days. Reheat in the oven to restore crispness.
Freezing: Wrap the galette in plastic wrap or aluminum foil, then place it in a freezer bag. Freeze for up to 2 months. Thaw in the fridge overnight before reheating.
Room Temperature: If consuming within a day, cover the galette with a clean kitchen towel. Keep at room temperature for up to 1 day.
If you enjoyed this Peach Galette or any other recipe on my blog, please leave a ⭐ star rating and let me know how it went in the comments below. I appreciate taking time to read about this recipe, thank you!
