
If you’re looking to jazz up your meals, this Roasted Garlic Aioli is the way to go! It’s creamy, tangy, and packs a punch of flavor that can take a simple dish and make it feel special.
This recipe fixes dull dips, greasy textures, and unstable emulsions, yielding a creamy sauce that stays smooth and versatile for fries, sandwiches, and roasted vegetables.
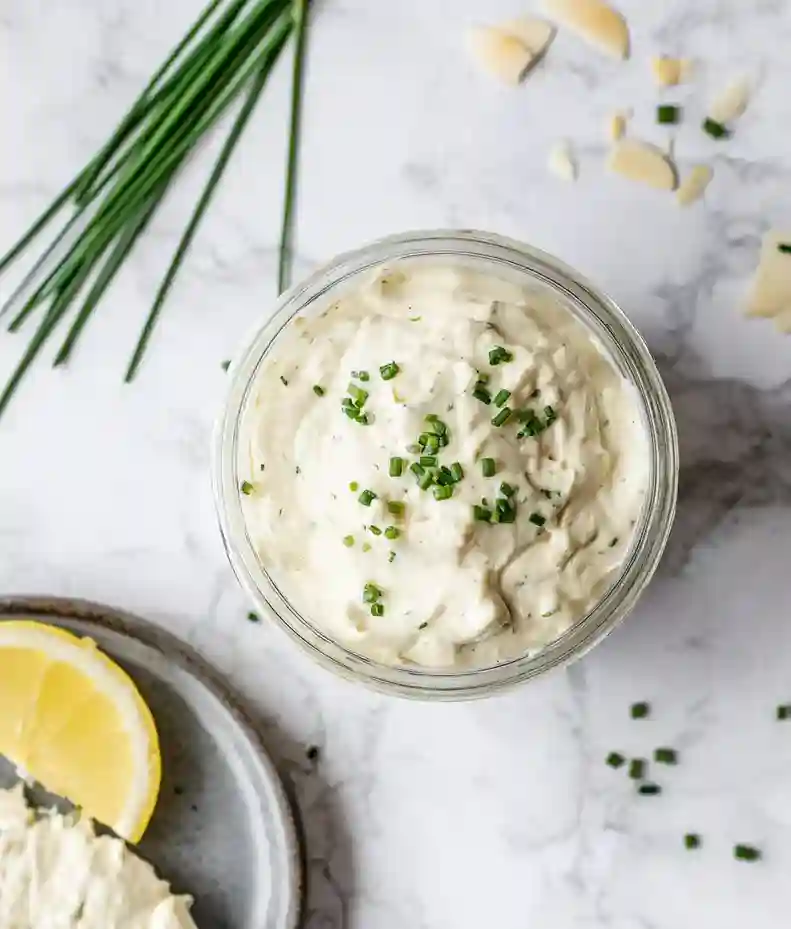
Sometimes, I struggle with sauces that just don’t come together right. It’s so frustrating! But this aioli is easy to whip up, thanks to the handy addition of mayonnaise. Plus, the roasted garlic gives it a nice depth that you’ll totally love.
Making this aioli takes about 30 minutes, and the best part is, you only need three main ingredients. It’s perfect for dipping veggies, spreading on sandwiches, or drizzling over roasted meats. And let’s be honest, that roasted garlic smell in your kitchen? It’s totally worth it.
If you enjoy making tasty spreads, you might like my Garlic Parmesan Green Beans with Bacon. They’re a scrumptious side dish that pairs so well with this aioli.
Why You Will Love This Recipe
- Rich Flavor : The roasted garlic adds a deep, sweet, and slightly tangy kick that really elevates the taste of your favorite dishes.
- Creamy Texture : Thanks to the mayonnaise, this aioli is incredibly smooth and creamy, making it a luxurious addition to both sandwiches and dips.
- Quick and Easy : With just a few simple ingredients and quick prep, you’ll have a delicious sauce ready to enjoy in no time.
- Long Shelf Life : Store it in the fridge for up to a week, making it a great option for meal prep and last-minute flavor boosts throughout the week.
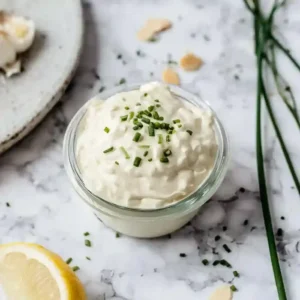
Easy Roasted Garlic Aioli Sauce
- Prep Time: 5 minutes
- Cool Time: 30 minutes
- Cook Time: 25 minutes
- Total Time: 60 minutes
- Yield: 8 servings 1x
- Category: sauce/dip
- Method: blending
- Cuisine: vegetarian
- Diet: vegetarian
Description
This roasted garlic aioli is a creamy, flavorful dip perfect for fries, burgers, and grilled seafood.
Ingredients
- 1 whole garlic bulb
- Drizzle olive oil
- ¾ cup mayonnaise
- 1 Tablespoon lemon juice, freshly squeezed
- Salt and pepper, to taste
Instructions
- Roast the Garlic: Preheat your oven to 375 degrees F (190 degrees C). Toss your garlic bulb in olive oil to coat it lightly. Wrap it tightly in foil and place it in the oven. Roast for about 25 minutes until the garlic is softened and fragrant. Keep an eye on it to avoid burning, as burnt garlic can become bitter.
- Cool & Squeeze Garlic: After 25 minutes, remove the garlic from the oven and let it cool until manageable. Once cool, gently squeeze the roasted garlic from the skins into a mixing bowl. Aim for a smooth, creamy texture without any hard chunks.
- Blend the Aioli: Place the squeezed roasted garlic into a blender along with the mayonnaise and freshly squeezed lemon juice. Blend until the mixture is smooth and creamy, about 1 minute. If the aioli feels too thick, add a splash of water or additional lemon juice as needed. Do not over-blend; you want a homogeneous mix rather than a runny one.
- Taste & Adjust Flavors: Stop the blender and taste your aioli. If it has a strong flavor, you can add a bit more mayonnaise to mellow it out. If you prefer a brighter taste, add a little more lemon juice. Ensure all flavors are balanced to your satisfaction.
- Chill Before Serving: Transfer the aioli to a container and refrigerate for at least 30 minutes before serving. This allows the flavors to meld beautifully. Skipping this step may result in a less robust taste.
Notes
- Storage Tips: Store the aioli in an airtight container in the fridge for up to a week to maintain freshness.
- Expert Tips: If garlic cloves are burnt or too hard to squeeze, make sure to cover them well with foil and monitor the roasting time. If the aioli is too thick or chunky, blend it in a food processor until you achieve the desired creaminess. When the flavor is too strong, adding more mayonnaise or lemon juice can help mitigate the intensity.
- Reheating Instructions: Reheating is not typically necessary for aioli. If desired, it can be returned to room temperature by letting it sit out for about 10 minutes before serving.
- Serving Suggestions: Serve with crispy fries or use as a spread on burgers. This aioli also pairs well with grilled seafood and roasted vegetables for a delightful meal.
- Recipe Variations: Add fresh herbs such as basil or dill for a different flavor profile. For a spicy kick, mix in a dash of hot sauce. Substitute Greek yogurt for mayonnaise for a lighter version.
- Ingredient Notes: Choose a fresh garlic bulb for the best flavor and select mayonnaise free from artificial ingredients for an authentic taste. Freshly squeezed lemon juice is ideal for brightness and flavor.
Nutrition
- Serving Size: 1 serving
- Calories: 144
- Sugar: 1g
- Sodium: 133mg
- Fat: 16g
- Saturated Fat: 2g
- Unsaturated Fat: 14g
- Trans Fat: 0g
- Carbohydrates: 1g
- Fiber: 1g
- Protein: 1g
- Cholesterol: 9mg
Recipe Tips
- If garlic cloves feel burnt or too hard to squeeze, covering them well with foil and monitoring closely while roasting helps achieve a perfect texture.
- For a smoother aioli, if the mixture turns out too thick or chunky, a quick blend in the food processor can achieve that desired creaminess.
- When the flavor of the aioli is stronger than preferred, a little extra mayonnaise or a splash more lemon juice works well to mellow it out.
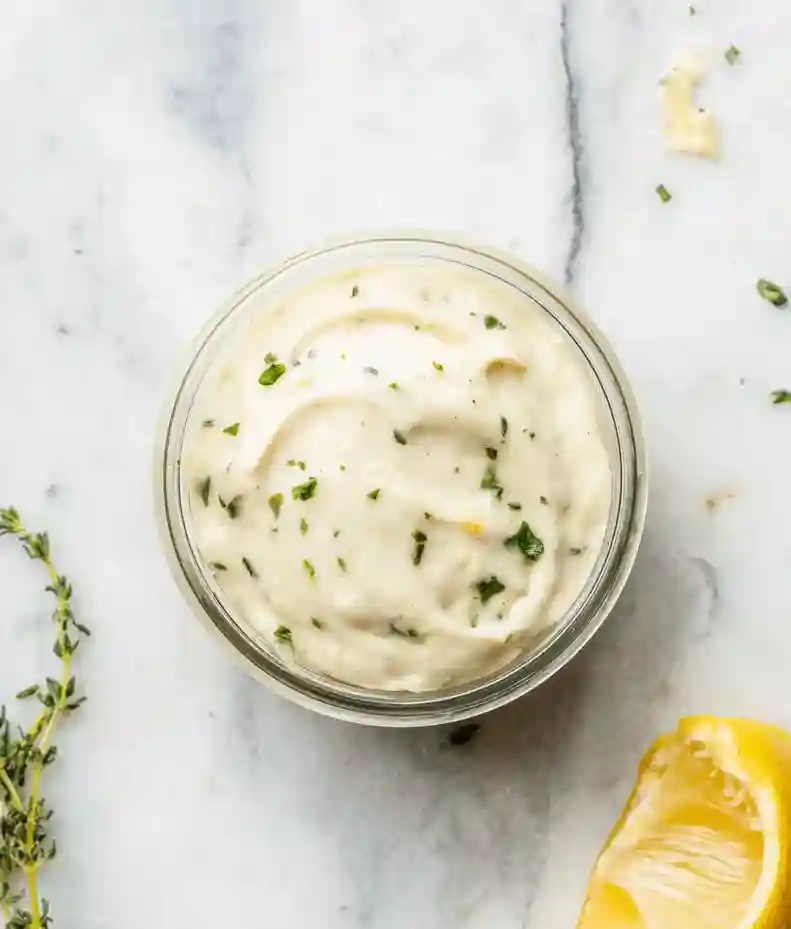
- If looking to add a twist, incorporating fresh herbs like chives or basil can introduce a refreshing dimension to the aioli’s flavor.
- For the freshest taste, aioli can be prepared ahead of time; it can stay good in the fridge for up to a week!
Serving Suggestions
Pair roasted garlic aioli with crispy fries for a satisfying snack or serve it as a spread on burgers. Enjoy it alongside grilled seafood or roasted vegetables for a delicious meal option.
This sauce works well in various dishes, including veggie wraps, sandwiches, or as a dip for fresh produce. It complements roasted meats and can enhance flavor in grain bowls or salads.
Consider adding a drizzle of lemon juice or a sprinkle of fresh herbs for added freshness. This touch brightens the overall taste of the aioli and adds a zing to your dishes.
Recipe variations
- You can use roasted shallots instead of roasted garlic for a sweeter, milder flavor in your aioli.
- Add ½ teaspoon of smoked paprika or cumin for an interesting twist on the traditional taste.
- Either mix in some capers or replace the lemon juice with balsamic vinegar to add a tangy complexity.
- If you want to scale this recipe, use 2 cups of mayo for larger gatherings and adjust seasonings accordingly.
Save This Recipe!
How to Store?
To keep your roasted garlic aioli fresh, follow these storage tips:
Refrigeration: Store in an airtight container in the fridge for up to 7 days. Keep it covered to maintain freshness.
Freezing: Transfer the aioli to a freezer bag, removing excess air. Freeze for up to 3 months. Thaw in the fridge overnight before use.
Serving: Serve cold straight from the fridge. If it thickens, stir in a splash of lemon juice for easier spreading.
Other Recipes You’ll Love
- Roasted Beet Salad
- Strawberry Spinach Salad with Poppy Seed Dressing
- Arugula Salad
- Creamed Peas with Shallots and Prosciutto
If you enjoyed this Roasted Garlic Aioli or any other recipe on my blog, please leave a ⭐ star rating and let me know how it went in the comments below. I appreciate taking time to read about this recipe, thank you!