Description
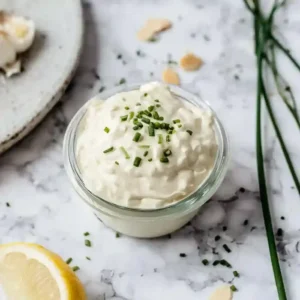
This roasted garlic aioli is a creamy, flavorful dip perfect for fries, burgers, and grilled seafood.
Ingredients
Scale
- 1 whole garlic bulb
- Drizzle olive oil
- ¾ cup mayonnaise
- 1 Tablespoon lemon juice, freshly squeezed
- Salt and pepper, to taste
Instructions
- Roast the Garlic: Preheat your oven to 375 degrees F (190 degrees C). Toss your garlic bulb in olive oil to coat it lightly. Wrap it tightly in foil and place it in the oven. Roast for about 25 minutes until the garlic is softened and fragrant. Keep an eye on it to avoid burning, as burnt garlic can become bitter.
- Cool & Squeeze Garlic: After 25 minutes, remove the garlic from the oven and let it cool until manageable. Once cool, gently squeeze the roasted garlic from the skins into a mixing bowl. Aim for a smooth, creamy texture without any hard chunks.
- Blend the Aioli: Place the squeezed roasted garlic into a blender along with the mayonnaise and freshly squeezed lemon juice. Blend until the mixture is smooth and creamy, about 1 minute. If the aioli feels too thick, add a splash of water or additional lemon juice as needed. Do not over-blend; you want a homogeneous mix rather than a runny one.
- Taste & Adjust Flavors: Stop the blender and taste your aioli. If it has a strong flavor, you can add a bit more mayonnaise to mellow it out. If you prefer a brighter taste, add a little more lemon juice. Ensure all flavors are balanced to your satisfaction.
- Chill Before Serving: Transfer the aioli to a container and refrigerate for at least 30 minutes before serving. This allows the flavors to meld beautifully. Skipping this step may result in a less robust taste.
Notes
- Storage Tips: Store the aioli in an airtight container in the fridge for up to a week to maintain freshness.
- Expert Tips: If garlic cloves are burnt or too hard to squeeze, make sure to cover them well with foil and monitor the roasting time. If the aioli is too thick or chunky, blend it in a food processor until you achieve the desired creaminess. When the flavor is too strong, adding more mayonnaise or lemon juice can help mitigate the intensity.
- Reheating Instructions: Reheating is not typically necessary for aioli. If desired, it can be returned to room temperature by letting it sit out for about 10 minutes before serving.
- Serving Suggestions: Serve with crispy fries or use as a spread on burgers. This aioli also pairs well with grilled seafood and roasted vegetables for a delightful meal.
- Recipe Variations: Add fresh herbs such as basil or dill for a different flavor profile. For a spicy kick, mix in a dash of hot sauce. Substitute Greek yogurt for mayonnaise for a lighter version.
- Ingredient Notes: Choose a fresh garlic bulb for the best flavor and select mayonnaise free from artificial ingredients for an authentic taste. Freshly squeezed lemon juice is ideal for brightness and flavor.
Nutrition
- Serving Size: 1 serving
- Calories: 144
- Sugar: 1g
- Sodium: 133mg
- Fat: 16g
- Saturated Fat: 2g
- Unsaturated Fat: 14g
- Trans Fat: 0g
- Carbohydrates: 1g
- Fiber: 1g
- Protein: 1g
- Cholesterol: 9mg