
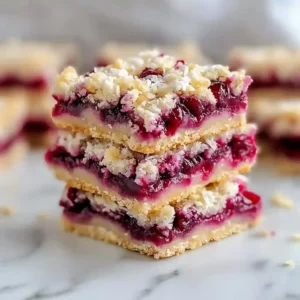
I’ve got a tasty treat for you with this tart cherry recipe. Imagine sweet shortbread and tangy tart cherries coming together in a delicious bar form. It’s a dessert that really hits the spot!
Solves crumbly crust, uneven red tart cherry filling, and messy edges with a sturdy crust, even fruit layer, and clean cuts for easy, portable bars.

Sometimes, it’s tricky to find a dessert that fits everyone’s dietary needs. Since my family has gluten allergies, I love making recipes that everyone can enjoy. These tart cherry pie bars are easy to whip up and perfect for sharing with friends!
What’s great about this recipe is it only takes about 20 minutes to prep, and then you let them bake for an hour. After that, you just need to chill them for a bit, and they’ll be ready to slice. Just remember to refrigerate them to make cutting easier; nobody wants a crumble mess on their hands!
If you love fruity desserts as much as I do, try these with my Raspberry Oatmeal Bars for something special!
Why You Will Love This Recipe
- Flavor Fusion The tartness of the cherries pairs beautifully with the sweetness of the shortbread, creating a delicious balance that’s hard to resist.
- Texture Contrast These bars have a delightful crunch from the buttery shortbread crust, complemented by the soft, juicy fruit layer on top.
- Convenience This recipe comes together with minimal hassle, making it a great choice for busy bakers who still want to whip up something special.
- Storage Friendly You can keep the bars at room temperature for a couple of days or pop them in the fridge for an extended treat without compromising flavor.
Easy Red Tart Cherry Pie Bars
- Prep Time: 20 minutes
- Cool Time: 2 hours
- Cook Time: 1 hour
- Total Time: 3 hours 15 minutes
- Yield: 12 bars 1x
- Category: Dessert
- Method: Baking
- Cuisine: American
- Diet: Vegetarian
Description
Delicious red tart cherry pie bars with a buttery crust and sweet cherry filling, perfect for any occasion.
Ingredients
- 2 (14-ounce) cans Oregon Fruit Red Tart Cherries, drained
- 1/2 cup sugar
- 2 tablespoons cornstarch
- 1/41/2 teaspoon kosher salt
- 1 tablespoon lemon juice
- 11/2 teaspoon vanilla extract
- 2 5/8 cups unbleached all-purpose flour
- 3/4 cup granulated sugar
- 1/21/2 teaspoon kosher salt
- 1/41/2 teaspoon baking powder
- 16 tablespoons unsalted butter, melted
- 3 tablespoons sweetened shredded coconut
- 1/41/2 teaspoon kosher salt
Instructions
- Make the Crust: Start by mixing your crust ingredients until you get that crumbly yet cohesive texture. It should feel sandy but hold together when pressed. This will give you a buttery base that contrasts with the cherry filling. Just be careful not to overwork it, or the crust might become tough.
- Press into Pan: Grab your mixture and press it firmly into the bottom of a lined baking pan. You’ll want it to be even and compact, so take your time. Once it’s all spread out and smooth, it’ll create a solid foundation for those juicy cherries. Don’t skip lining the pan—sticking is a real possibility otherwise.
- Pre-Bake the Crust: Pop the crust in the oven for a quick pre-bake at 375 degrees F. You’ll notice it turning golden and smelling buttery, which is a sign things are going well. This step helps the crust hold up against the cherry filling, keeping it from getting soggy. Keep an eye on it, as overbaking can lead to a dry texture.
- Prepare the Cherry Filling: In a saucepan, stir together your cherry filling ingredients over medium heat. You should see them start to bubble and thicken—a lovely deep aroma will fill your kitchen. This is where the magic happens, so be attentive and stir consistently. If the mixture looks too runny, let it cook a bit longer to thicken properly.
- Add the Filling: Once your filling is nice and thick, pour it over the pre-baked crust. Gently spread it out so it covers every corner. The vibrant red cherries will look so inviting! Just be careful not to disturb the crust underneath as you do this.
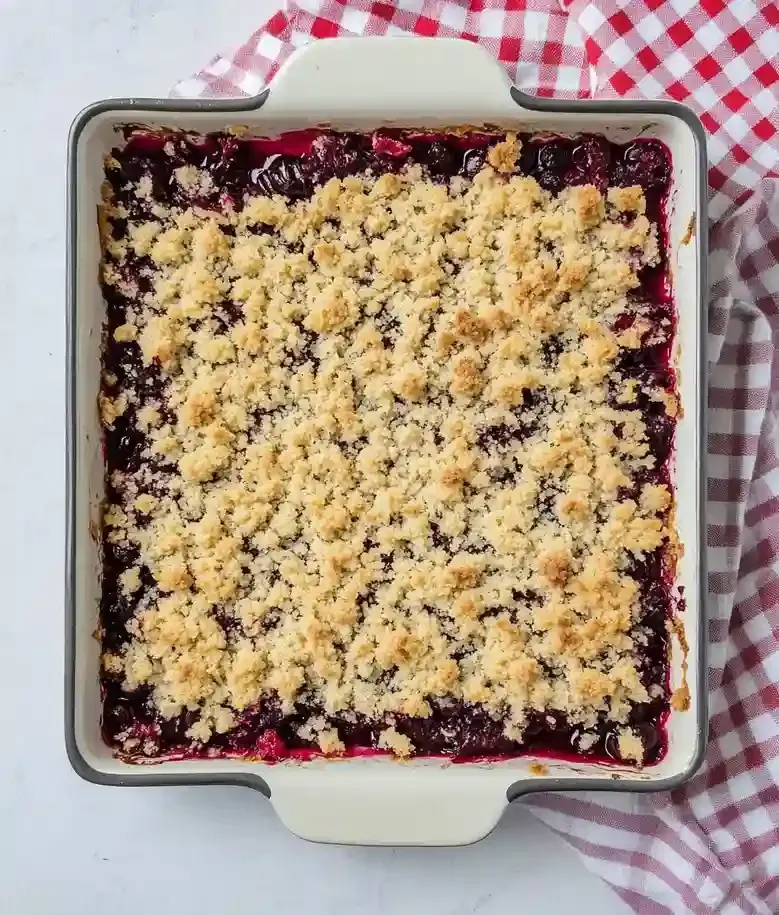
- Top with Crumbles: Sprinkle your reserved crust mixture over the cherry filling. It should create a nice layer of crumbles on top that will bake up to be crispy. This adds texture and helps balance out the juicy filling. Make sure to leave some areas exposed for that beautiful cherry shine!
- Bake & Cool: Bake everything until the top is golden brown and bubbly. The aroma will fill your kitchen, making it hard to wait! Once it’s done, let it cool completely in the pan. This waiting is key; cutting too soon means the bars might fall apart, so be patient for those glorious slices.
- Slice & Serve: Once it’s cool, remove the bars from the pan and slice them into squares. They should be a beautiful mix of crust and cherry filling, looking almost too good to resist! Serve these as a sweet ending to your meal, but don’t forget to enjoy the leftovers as a tea time snack later on!
Notes
- Store the bars at room temperature in an airtight container for up to 2 days. Refrigerate for up to 7 days.
- Use room-temperature butter for best results.
- Weigh flour for accuracy to avoid a dry crust.
- Chill bars before slicing for cleaner cuts.
- Gently warm in the microwave for 15-20 seconds for a softer treat.
- Serve with whipped cream for added richness.
- Pair with vanilla ice cream to complement the tartness.
- Top with a sprinkle of powdered sugar for a decorative touch.
- Add almonds for a nutty flavor.
- Mix in some cinnamon or nutmeg for spice.
- Use coconut cream instead of butter for a dairy-free option.
- If the cherry filling seems too runny, ensuring the cornstarch is fully dissolved can help it set properly during cooking.
- When slicing the bars, refrigerating them for about an hour can make it easier to cut without crumbling.
- If the crust turns out dry, weighing the flour may provide a more accurate measurement compared to using cups.
- For a touch of sweetness, adjusting the sugar in the cherry filling allows you to cater to personal taste preferences.
- If using a different pan size, keep an eye on the bake time, as it may need adjustment to achieve the right texture.
Nutrition
- Serving Size: 1 bar
- Calories: 329
- Sugar: 22g
- Sodium: 153mg
- Fat: 16g
- Saturated Fat: 10g
- Unsaturated Fat: 0g
- Trans Fat: 0g
- Carbohydrates: 44g
- Fiber: 1g
- Protein: 3g
- Cholesterol: 40mg
Recipe Tips
- If the cherry filling seems too runny, ensuring the cornstarch is fully dissolved can help it set properly during cooking.
- When slicing the bars, refrigerating them for about an hour can make it easier to cut without crumbling.
- If the crust turns out dry, weighing the flour may provide a more accurate measurement compared to using cups.
- For a touch of sweetness, adjusting the sugar in the cherry filling allows you to cater to personal taste preferences.
- If using a different pan size, keep an eye on the bake time, as it may need adjustment to achieve the right texture.
Serving Suggestions
Serve these cherry pie bars with whipped cream for added richness. Pair them with vanilla ice cream to complement the tartness.
These bars can also be included in dessert platters or served at summer picnics. They work well at family gatherings and National Cherry Month celebrations.
Top the bars with a sprinkle of powdered sugar for a decorative touch. You can also drizzle them with a light glaze for extra sweetness.
Recipe variations
- You can use fresh tart cherries or frozen tart cherries in place of the canned variety for a fresher flavor profile.
- Add 1 teaspoon of cinnamon or nutmeg for a warm, aromatic note to enhance the overall taste.
- Either mix in 1/2 cup of chopped almonds for a nutty crunch or 3 tablespoons of sweetened shredded coconut for extra texture.
- If you want to make a larger batch, double the recipe to use 4 cans of cherries and 5 cups of flour for a larger pan.
Save This Recipe!
How to Store?
To keep your Easy Red Tart Cherry Pie Bars fresh, follow these storage tips:
Room Temperature: Store bars in an airtight container at room temperature for up to 2 days. Keep them covered to maintain moisture.
Refrigeration: If you want longer storage, refrigerate bars in an airtight container for up to 7 days. This maintains flavor and texture.
Freezing: Wrap each bar tightly in plastic wrap or aluminum foil, then place in a freezer bag. Freeze for up to 3 months. Thaw in the refrigerator or at room temperature before serving.
If you enjoyed this tart cherry recipe or any other recipe on my blog, please leave a ⭐ star rating and let me know how it went in the comments below. I appreciate taking time to read about this recipe, thank you!