

I can’t wait to share this Mexican Street Corn Taco Casserole with you! It’s packed with all the flavors you love from nachos and tacos, but in a fun casserole form. The combination of spices and creamy goodness makes it a new favorite at our house.
Solves weeknight dinner stress by delivering quick prep with simple ingredients, reducing cleanup time, and providing easy leftovers for busy families.
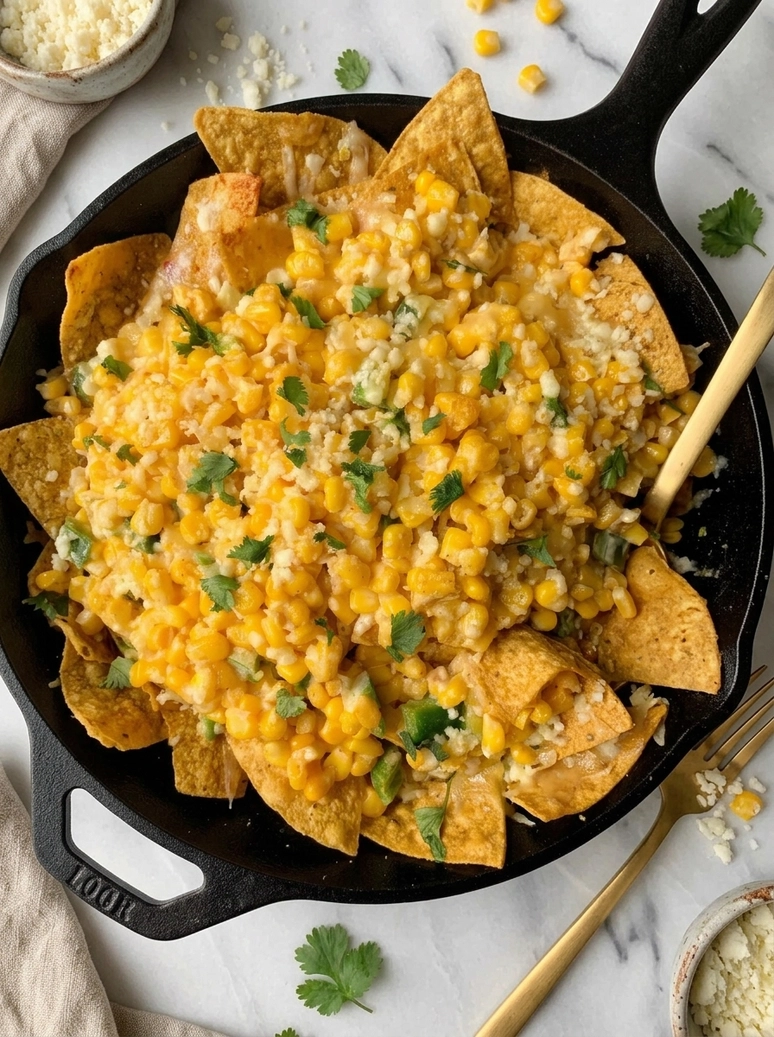
When I used to make taco night, I always worried about soggy chips and missing out on all those delicious toppings. But this casserole changes everything! It’s super easy to throw together and really does keep everything nice and crispy when you serve it right away.
You won’t believe how quick this meal comes together. With just 5 minutes of prep and 15 minutes in the oven, you’ll have a tasty dish ready in only 20 minutes. It’s perfect for busy weeknights when you want something comforting but don’t want to spend ages in the kitchen.
If you love to whip up easy meals, this is one you’ll want to try. If you’re in the mood for something sweet too, check out my Black Bean Chicken Salad for a fresh side!
Why You Will Love This Recipe
- Flavor Explosion : This casserole’s got a spicy, creamy, and zesty flavor that hits all the right notes. You’ll feel like you’re enjoying authentic street corn without leaving your kitchen.
- Texture Contrast : The combination of crunchy tortilla chips and tender corn gives each bite a satisfying mix of textures. It’s comforting and fun to eat, no sogginess here.
- Quick and Easy : With just 20 minutes from start to finish, this dish fits perfectly into busy weeknights. It’s a hassle-free way to serve up something flavorful for dinner.
- Convenient Storage : Leftovers stay tasty in the fridge for up to three days. You can easily reheat it for lunch or dinner, making it a great meal prep option.

Easy Mexican Street Corn Taco Casserole
- Prep Time: 5 minutes
- Cool Time: 0 minutes
- Cook Time: 15 minutes
- Total Time: 20 minutes
- Yield: About 4 servings 1x
- Category: Casserole
- Method: Baking
- Cuisine: Mexican
- Diet: Gluten Free
Description
A flavorful and cheesy Mexican street corn taco casserole that’s easy to make in just 20 minutes.
Ingredients
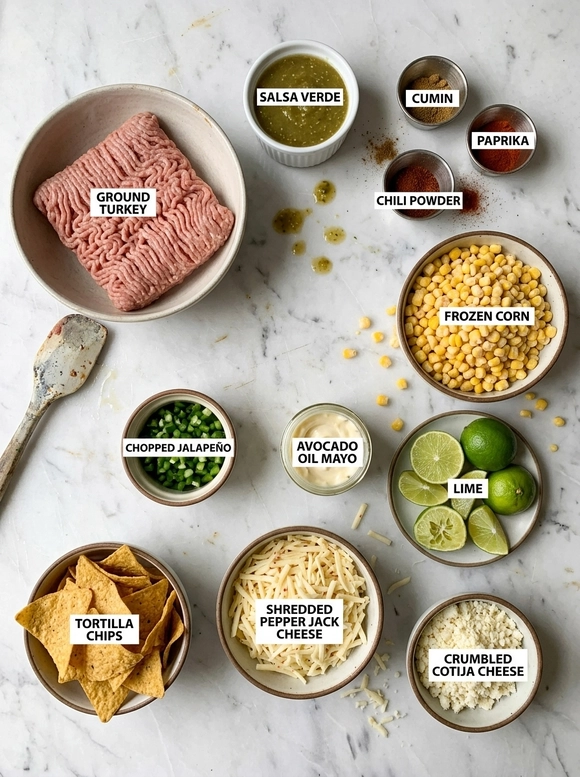
- 1 lb ground meat (turkey, chicken, or beef)
- 12 oz jar salsa verde
- 3 cups frozen or canned corn
- 1 jalapeño, seeded and chopped
- 1/4 cup avocado oil mayo
- 1 cup pepper jack cheese, shredded
- 1 cup crumbled cotija cheese
- Tortilla chips for serving
- Cilantro for garnish
- Juice of 1 lime
- 1/21/2 teaspoon cumin
- 1/21/2 teaspoon paprika
- 3/41/2 teaspoon chili powder
- Sea salt and black pepper to taste
Instructions
- Cook the Corn & Peppers: Start by heating some avocado oil mayo in a skillet over medium heat. Toss in the frozen or canned corn and the chopped jalapeño. You will know it is ready when you hear that satisfying sizzle and the sweet aroma fills your kitchen. Stir occasionally to prevent burning and be careful not to overcook the corn to keep that lovely crunch.
- Brown the Ground Meat: Add the ground meat to the skillet. Cook until it reaches a beautiful brown color, noticing the meat releasing flavorful juices – this is a great sign. Keep stirring to break up any chunks and avoid a mushy texture. If you see it is not browning nicely, turn up the heat slightly.
- Add Seasonings & Cream: Sprinkle in the cumin, paprika, and chili powder. Pour in the remaining avocado oil mayo. Mix well until everything is combined, enjoying the enticing aroma. Be sure to double-check the spice levels to avoid overwhelming heat.
- Layer the Casserole: In a suitable baking dish, start layering with the corn and meat mixture. Spread it out evenly to create a solid base, making sure each section gets its fair share. Be cautious not to overcrowd the dish to allow everything to bake evenly.
- Add Cheese & Broil: Sprinkle a generous amount of pepper jack cheese and crumbled cotija cheese over the top. Place the dish in the oven. You will soon notice a golden-brown crust forming, your cue to broil for a couple of minutes for that bubbly finish. Keep an eye on it to ensure it does not burn, as broilers can be sneaky.
- Serve & Enjoy: Once it is out of the oven, let it sit for a few moments to set. The combination of cheesy goodness and fresh flavors will captivate your senses. Grab some gluten-free taco shells or tortilla chips for serving. Remember, serving hot keeps those textures nice and crispy!
Notes
- Storage Tips: Store leftovers in an airtight container in the refrigerator for up to 3 days.
- Expert Tips: If cheese does not melt well, broil for an additional 30-60 seconds to achieve a bubbly, golden layer on top. If meat retains a pink color after cooking, raise the heat slightly and continue cooking until fully browned. For the best chip texture, serve immediately after baking to avoid sogginess. If the dish is too spicy, consider adding more cheese or a dollop of sour cream.
- Reheating Instructions: Reheat in the oven at 350 degrees F for about 10-15 minutes or until warmed through.
- Serving Suggestions: Serve with a side of guacamole, top with fresh cilantro and a squeeze of lime, or accompany with a simple mixed green salad.
- Recipe Variations: Add black beans for extra protein and fiber, incorporate bell peppers for added color and taste, or use sweet corn instead of regular corn for a sweeter profile.
- Ingredient Notes: Choose high-quality ground meat for best flavor; you can substitute any cheese you prefer, such as cheddar or Monterey Jack. Avoid soggy chips by serving immediately after baking.
Nutrition
- Serving Size: 1 serving
- Calories: 350
- Sugar: 1g
- Sodium: 600mg
- Fat: 20g
- Saturated Fat: 7g
- Unsaturated Fat: 10g
- Trans Fat: 0g
- Carbohydrates: 15g
- Fiber: 1g
- Protein: 30g
- Cholesterol: 90mg
Recipe Tips
- If cheese isn’t melting well, broil the casserole for 30-60 seconds to achieve a bubbly and golden layer on top.
- If the meat retains a pink color after cooking, raise the heat slightly and continue cooking until it’s fully browned.
- For the best chip texture, serve the casserole immediately after baking to avoid sogginess from the sauce.
- If the dish turns out too spicy, consider adding more cheese or a dollop of sour cream to balance the heat.
- If you’re short on time, prep the ingredients ahead of time, but bake just before serving for the best texture.
Serving Suggestions
Serve the Mexican street corn taco casserole alongside guacamole and a mixed green salad for a hearty meal. Top it with fresh cilantro and a squeeze of lime for added brightness and flavor.
This casserole works well in various settings, such as family gatherings or game day events. You can also enjoy it on its own or as part of a Mexican fiesta spread.
A drizzle of your favorite hot sauce adds a spicy kick to the dish. Consider topping it with additional lime juice to brighten the flavors even more.
Recipe variations
- You can use shredded rotisserie chicken instead of ground meat for a quicker option without sacrificing flavor.
- Add 1 teaspoon of smoked paprika and 1/2 teaspoon of garlic powder to boost the seasoning profile.
- Either integrate diced zucchini or swap in diced sweet potatoes for a different texture and taste.
- If you’re making this for a larger group, double the ingredients, using 2 pounds of meat and 6 cups of corn.
Save This Recipe!

How to Store?
To keep your Mexican street corn taco casserole fresh, follow these storage tips:
Refrigeration: Store the casserole in an airtight container in the refrigerator for up to 3 days.
Freezing: Wrap the casserole tightly in plastic wrap or aluminum foil, then place in a freezer-safe bag. Freeze for up to 2 months. Thaw overnight in the refrigerator before reheating.
Reheating: Warm individual portions in the microwave or reheat in the oven until heated through. Serve immediately to maintain texture.
Other Recipes You’ll Love
- Roasted Asparagus and Brussels Sprouts
- Roasted Asparagus with Orange Glaze
- Chickpea Kale Salad
- Chickpea Quinoa Salad
If you enjoyed this Mexican Street Corn Taco Casserole or any other recipe on my blog, please leave a ⭐ star rating and let me know how it went in the comments below. I appreciate taking time to read about this recipe, thank you!
