
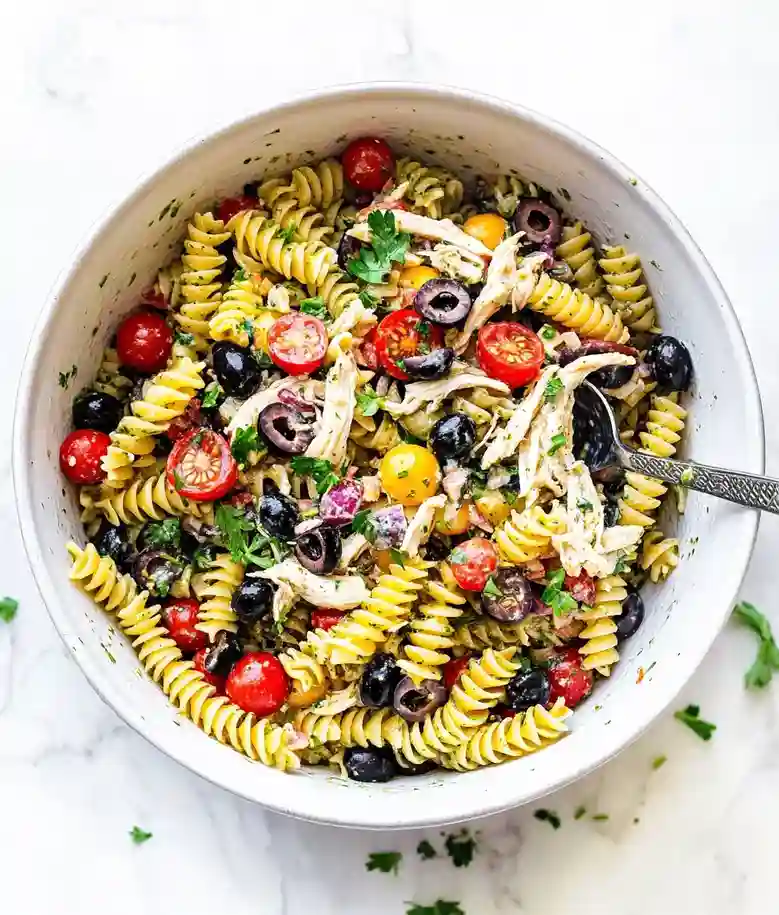
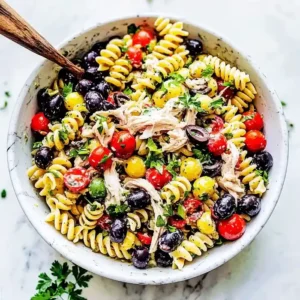
If you’re looking for a tasty dish that’s quick and easy, then this Italian Pasta Salad with chicken is just what you need! It’s colorful, filled with fresh ingredients, and makes great leftovers for lunch the next day.
This salad fixes bland lunches, heavy mayo reliance, messy prep, time sinks, and lacking color by offering a quick, tossable dish with crisp vegetables.
Sometimes I struggle to find a meal that satisfies everyone in my family, but this salad is a big hit. Whether you’re feeding kids or adults, it’s packed with different flavors and textures that please everyone. Plus, it feels light yet filling.
This recipe only takes about 25 minutes from start to finish! You don’t even have to turn on the stove. The secret to delicious pasta salad is really in the dressing. If you mix it well, it makes all the ingredients pop with flavor.
If you need another meal idea, you might want to check out this Recipe Name for a different twist on pasta salad.
Why You Will Love This Recipe
- Fresh and Flavorful: This Italian Pasta Salad bursts with savory and zesty flavors, thanks to the fresh ingredients like cherry tomatoes, roasted red pepper, and herbs that keep every bite exciting.
- Convenient for Any Meal: You can whip this salad up in just 25 minutes, making it a great choice for quick lunches or meal prep for busy days.
- Good Texture: With crunchy vegetables and tender pasta, it’s got a satisfying mix of textures that makes it enjoyable to eat, keeping things interesting with every forkful.
- Storage Made Easy: By keeping the pasta, add-ins, and dressing separate, you can prep ahead and mix just before serving, ensuring it stays fresh and tasty.
Classic Italian Pasta Salad Recipe
- Prep Time: 25 minutes
- Cool Time: 30 minutes
- Cook Time: 0 minutes
- Total Time: 55 minutes
- Yield: 8 servings 1x
- Category: salad
- Method: mixing
- Cuisine: Italian
- Diet: gluten free
Description
A delicious and refreshing Italian Pasta Salad featuring chicken, perfect for summer gatherings or meal prep.
Ingredients
- 3 cups uncooked gluten-free pasta (small shells or rotini)
- 1 cup rotisserie chicken (shredded and coarsely chopped)
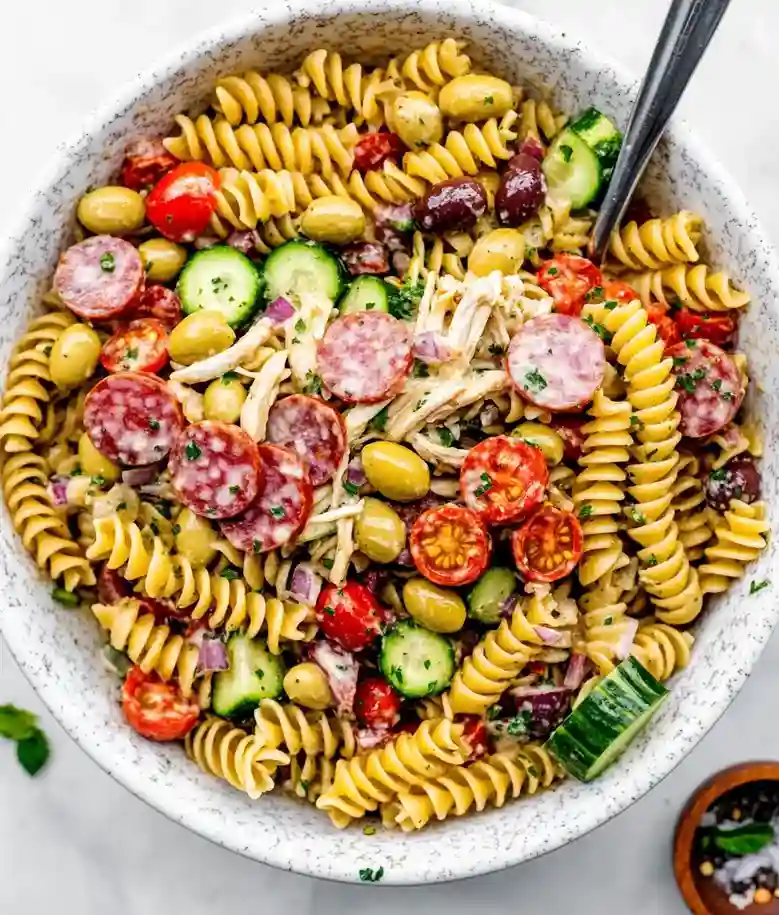
- 1/2 cup salami (thinly sliced)
- 1 cup cherry tomatoes (halved)
- 1/4 cup fresh flat-leaf parsley (finely diced)
- 1/2 cup black olives (halved)
- 1/2 cup roasted red bell pepper (coarsely chopped)
- 1 cup English cucumber (chopped)
- 1/4 cup finely diced red onion
- 1/3 cup freshly grated Parmesan cheese
- 1/3 cup red wine vinegar
- 1–1/21/2 teaspoon Dijon-style mustard
- 1/21/2 teaspoon dried oregano
- 1/21/2 teaspoon Italian seasoning
- 11/2 teaspoon granulated sugar
- 1/2 cup olive oil
- 2 tablespoons whole mayonnaise
- Salt and pepper to taste
Instructions
- Cook the Pasta: Start by boiling your gluten-free pasta in salted water until it is al dente, which usually takes just a few minutes. You will know it is ready when it is firm yet tender with a slight bite. Taste it as it cooks; overcooked pasta can be a bummer later!
- Chill & Drain: Once the pasta is done, drain it well and rinse it under cold water to stop the cooking. It should feel cool and fresh as you rinse. This step helps prevent the pasta from getting mushy when mixed into the salad, so do not skip it!
- Chop the Ingredients: Chop up your veggies, chicken, and cheese into small pieces, aiming for equal sizes. The colors and scents should be bright and inviting. Keep them uniform for easy mixing; otherwise, you might end up with big clumps that do not distribute well.
- Mix the Dressing: Whisk together olive oil, red wine vinegar, Dijon-style mustard, dried oregano, Italian seasoning, granulated sugar, salt, and pepper until it is all well blended and aromatic. It should look smooth and glossy. A common mistake here is not adjusting the seasoning, so make sure to taste and add salt or pepper as needed.
- Toss It All Together: In a large bowl, gently combine the pasta, chopped veggies, chicken, salami, cheese, and dressing, ensuring everything gets a good coat. You will want to see the vibrant mix of colors and textures. Be careful not to mash the pasta or over-mix, which could lead to a mushy salad.
- Chill and Serve: Let the salad sit in the fridge for about 30 minutes to enhance the flavors. The aroma will be irresistible! Remember, dressing it too early can soak up moisture, making it less flavorful. If you are planning on saving leftovers, just dress what you will eat right away!
Notes
- Storage Tips: Keep the pasta, salad add-ins, and dressing in separate sealed containers in the fridge. Mix them right before serving. Once mixed, this pasta salad tastes best the same day.
- Expert Tips: If you are serving this outside, placing the bowl over ice helps maintain a refreshing temperature.
- When cooking your pasta, adding about 1 tablespoon of salt to the water elevates its flavor.
- If you do not want mushy pasta, it helps to follow the cooking instructions on the package closely.
- For easier mixing, cutting all the ingredients into small pieces makes serving and eating a breeze.
- If you have extra dressing, only coat what you will eat right away to prevent the pasta from drying out.
Nutrition
- Serving Size: 1 cup
- Calories: 435
- Sugar: 3g
- Sodium: 1071mg
- Fat: 30g
- Saturated Fat: 7g
- Unsaturated Fat: 0g
- Trans Fat: 0g
- Carbohydrates: 23g
- Fiber: 2g
- Protein: 19g
- Cholesterol: 48mg
Recipe Tips
- If you’re serving this outside, placing the bowl over ice helps maintain a refreshing temperature.
- When cooking your pasta, adding about 1 tablespoon of salt to the water elevates its flavor.
- If you don’t want mushy pasta, it helps to follow the cooking instructions on the package closely.
- For easier mixing, cutting all the ingredients into small pieces makes serving and eating a breeze.
- If you have extra dressing, only coat what you’ll eat right away to prevent the pasta from drying out.
Serving Suggestions
Pair this pasta salad with grilled chicken or steak for a satisfying meal. It works well alongside corn on the cob or elote, bringing freshness to your plate.
You can use this dish as a foundation for other meals, such as a cold picnic entrée or at potlucks. It also complements summer barbecues and family gatherings, making it a crowd favorite.
Add a drizzle of olive oil or balsamic vinaigrette for additional flavor. A squeeze of fresh lemon juice can enhance the overall taste before serving.
Recipe variations
- You can use bowtie pasta or penne instead of small shells or rotini for a different texture.
- Add 1/2 teaspoon garlic powder or 1 clove of minced garlic for an extra kick in flavor.
- Either include diced bell peppers or shredded carrots to introduce some sweetness and crunch into the salad.
- If you’re making a larger portion, cook 4.5 cups of pasta and double the remaining ingredients for a big-batch salad.
Save This Recipe!
How to Store?
To keep your italian pasta salad with chicken fresh, follow these storage tips:
Refrigeration: Store pasta, salad add-ins, and dressing in separate airtight containers in the fridge for up to 3 days.
Freezing: Combine pasta and chicken in a freezer bag, seal, and freeze for up to 2 months. Thaw in the fridge before serving.
Serving Idea: Toss the salad ingredients right before serving to maintain freshness. Enjoy the flavors at their best.
Other Recipes You’ll Love
- Vegetarian Roasted Tomato Burrata
- Vegetarian Pickled Jalapeno Pasta Salad
- Vegetarian Sun-Dried Tomato and Spinach Orzo Salad
- Vegetarian Mushroom Pasta Salad
If you enjoyed this Italian Pasta Salad with Chicken or any other recipe on my blog, please leave a ⭐ star rating and let me know how it went in the comments below. I appreciate taking time to read about this recipe, thank you!