Description
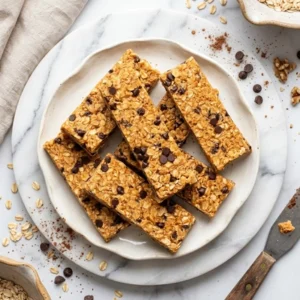
Simple no-bake homemade granola bars that are healthy and easy to make.
Ingredients
Scale
- 1 cup (240g) very smooth creamy natural peanut butter or cashew butter
- 2/3 cup (160g) honey
- 11/2 teaspoon (5ml) vanilla extract
- Heaping 1/21/2 teaspoon (2.5g) sea salt
- 2 1/2 cups (250g) whole rolled oats
- 1/3 cup (60g) mini chocolate chips
- 3 tablespoons (30g) pepitas or crushed peanuts or cashews
Instructions
- **Mix Dry Ingredients**: Start by tossing together the oats, nuts, and seeds in a large bowl. You will notice a nutty aroma wafting up. This mix is where the base flavor comes from, so give it a good stir to combine everything evenly. Be careful not to have any clumps of oats.
- **Stir in Wet Ingredients**: Add your nut butter and honey to the dry mix, stirring until everything is coated evenly. The mixture should feel sticky and cohesive, smelling sweet and nutty. This helps the bars hold together, so make sure it is well combined—no dry patches allowed.
- **Press into Pan**: Transfer your mixture to a lined baking dish and press it down firmly. Use a spatula or your hands to pack it tightly, which will help it stick together once cut. If it feels too loose, you might end up with crumbling bars later.
- **Chill to Firm Up**: Pop the pan into the fridge and let it chill for about 60 minutes. The bars should feel set and firm when done, making them easier to slice later. Do not skip this step; it is key to achieving that tasty, chewy texture.
- **Slice & Store**: Once chilled, lift the bars out and slice them into your desired size. You will notice clean edges and that lovely nutty smell. If they are falling apart, you may need to ensure you used enough nut butter or pressed them firmly enough before chilling. Store in the fridge with parchment paper between layers to keep them fresh.
Notes
- Store in the fridge for up to a week. Alternatively, freeze for up to 2 months. Let frozen bars thaw for 20 minutes before eating.
- Use runny nut butter for the best binding. Do not skip the chilling time to achieve the ideal texture.
- No reheating required.
- Pair with a piece of fruit for a balanced snack. Enjoy with a yogurt dip for extra flavor. Serve alongside your morning coffee or tea.
- Add shredded coconut for tropical flavor. Substitute almonds for the peanuts for a unique twist. Mix in dried cranberries for a tart element.
- For a plant-based option, substitute honey with brown rice syrup or maple syrup. If mini chocolate chips are unavailable, use finely chopped dark chocolate as a substitute.
- If the bars crumble when cutting, having enough nut butter and chilling them for the full time can help maintain their shape. For a cohesive mixture, adding a bit more nut butter or honey can work wonders if it feels too crumbly before pressing. Adjusting the honey or tossing in extra chocolate chips can satisfy a sweeter palate. When preparing, opting for very smooth and runny nut butter makes a difference in ensuring the bars hold together well. If the texture is not quite right, do not skip the chilling step; it is crucial for achieving that chewy consistency you will love.
Nutrition
- Serving Size: 1 bar
- Calories: 350
- Sugar: 1g
- Sodium: 600mg
- Fat: 20g
- Saturated Fat: 7g
- Unsaturated Fat: 10g
- Trans Fat: 0g
- Carbohydrates: 15g
- Fiber: 1g
- Protein: 30g
- Cholesterol: 90mg