
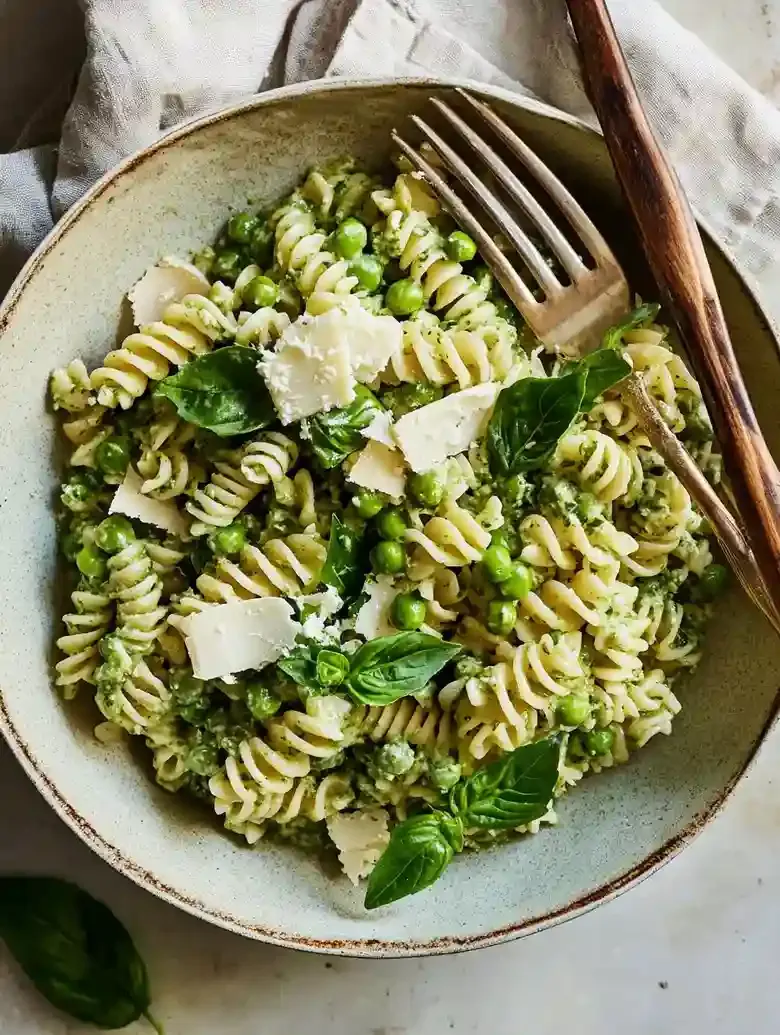
This spring pasta dish is a delightful mix of vibrant peas, fresh garlic, and a hint of zesty lemon. It’s a great way to savor spring produce in a simple yet delicious bowl of pasta.
This recipe addresses the concerns of blandness and texture in pasta dishes, delivering a fresh, vibrant option for springtime meals.
I often find myself in a rush during spring, juggling my kids and dinner prep. This recipe truly saves the day by using just a handful of ingredients, so I can whip it up in 20 minutes while still enjoying perfectly cooked peas and pasta.
What really makes this recipe stand out is how it keeps the flavors fresh. Each step is easy, so you don’t stress about timing. Trust me, once you get the pasta cooking, you’ll have your creamy pea mixture ready by the time everything comes together.
If you like this fresh flavor combo, you should definitely try my Blueberry Butter Swim Biscuits for a tasty addition to your spring meals.
Table of contents
Why You Will Love This Recipe
- Bright and Fresh Flavor – The burst of sweetness from frozen and sugar snap peas, paired with lemon juice, creates a zesty dish that captures the essence of springtime in every forkful. It’s a refreshing choice that can lighten any meal.
- Quick Preparation – With just 5 minutes of prep and 15 minutes of cooking time, this dish is ready in no time. Perfect for weeknight dinners when you want something satisfying without spending hours in the kitchen.
- Nutrition-Packed – This dish packs a nutrient-rich punch, thanks to the abundance of peas and fresh herbs. You’ll enjoy a dish that’s not only tasty but also contributes a good amount of vitamins and minerals to your plate.
- Versatile and Customizable – You can easily swap in seasonal vegetables or proteins like chicken or shrimp, making it adaptable for different tastes and dietary preferences. It’s a go-to for any spring-inspired meal planning!
Spring Pea Pasta Recipe
- Prep Time: 5 minutes
- Cool Time:
- Cook Time: 15 minutes
- Total Time: 20 minutes
- Yield: 8 servings 1x
- Category: Main Course
- Method: Boiling and sautéing
- Cuisine: Italian
- Diet: Vegetarian
Description
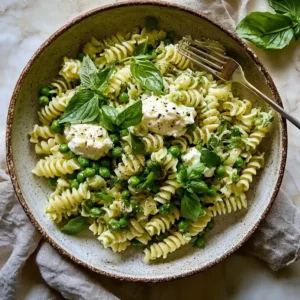
A fresh and vibrant spring pea pasta dish with creamy burrata, perfect for a vegetarian meal.
Ingredients
- 10 ounces (284 g) frozen peas
- ½ cup (50 g) sugar snap peas
- 10 ounces (284 g) pasta, short shape preferred
- 2 cloves garlic, fresh
- ⅓ cup (30 g) Parmesan cheese, freshly grated
- 2 tablespoons (30 ml) olive oil, extra virgin
- 1 lemon, juiced
- 6 ounces (170 g) burrata cheese
- Kosher salt, to taste
- Freshly cracked black pepper, to taste
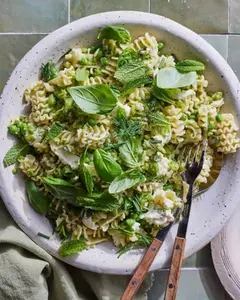
- Fresh herbs (optional), such as fresh mint
Instructions
- Step 1: Bring a large pot of water to a boil. Add the frozen peas and sugar snap peas. Boil gently for about 2 minutes until almost tender. Watch carefully to avoid overcooking, as peas can rapidly become mushy and lose texture.

- Step 2: Using a slotted spoon or spider, remove the peas from the boiling water. Immediately plunge them into a bowl of ice water to cool completely. This rapid cooling preserves the peas’ bright color, crispness, and fresh flavor.
- Step 3: In the same pot of boiling water, add the pasta and cook according to package directions until al dente. Check regularly by tasting to ensure pasta achieves the firm yet tender texture that will hold up well when mixed with the pea mixture.
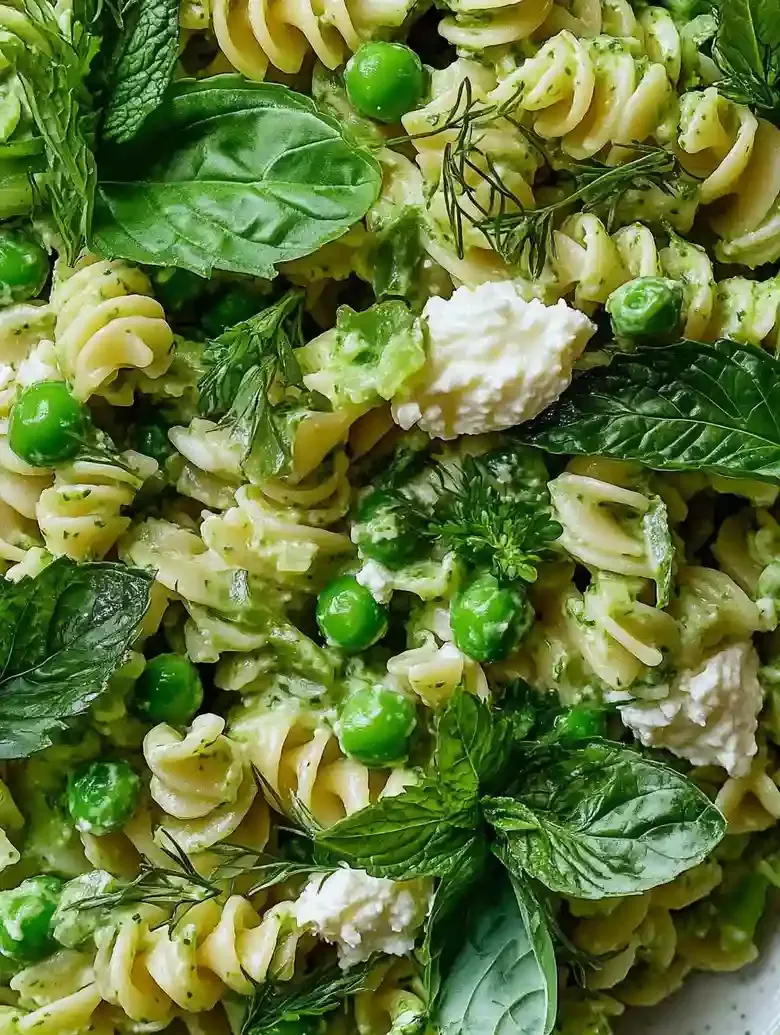
- Step 4: While the pasta cooks, transfer half of the drained peas to a bowl. Use a fork to smash them, leaving some peas whole for texture. This creates a creamy yet chunky base that will blend nicely with the pasta.
- Step 5: In a skillet or pan, combine the smashed peas, whole peas, minced garlic, olive oil, and lemon juice. Taste and season gradually with kosher salt and freshly cracked black pepper, adjusting step by step to balance the flavors without overpowering the fresh peas.
- Step 6: Drain the cooked pasta and add it to the skillet with the peas and garlic. Toss gently over low heat to warm the mixture and meld the flavors together. Avoid higher heat to prevent further cooking and softening of the peas.
- Step 7: Cut the burrata into smaller pieces if needed. Gently fold the burrata into the pasta off the heat to distribute its creamy richness evenly throughout the dish.
Notes
- Room Temperature: Store in an airtight container at room temperature for up to 1 day to retain texture and flavor.
- Refrigeration: Keep in an airtight container in the refrigerator for up to 3 days. Serve chilled or gently reheat on low heat before serving.
- Freezing: Place in a freezer-safe container or bag, freeze for up to 2 months. Thaw overnight in the refrigerator before reheating.
- To prevent overcooking peas, strictly limit boiling time to 2 minutes and immediately chill in ice water.
- If pasta sticks during cooking, stir in about 1 tablespoon of olive oil to keep it separate.
- If sauce or pea mixture is too thick, gradually add up to ¼ cup of reserved pasta water while stirring to reach your preferred consistency.
- Taste frequently during seasoning and add salt and pepper gradually for balanced flavor without overwhelming freshness.
- When mixing in burrata, cutting it into smaller pieces helps distribute creaminess without clumps.
Nutrition
- Serving Size: 1 serving
- Calories: 350
- Sugar: 1g
- Sodium: 600mg
- Fat: 20g
- Saturated Fat: 7g
- Unsaturated Fat: 10g
- Trans Fat: 0g
- Carbohydrates: 15g
- Fiber: 1g
- Protein: 30g
- Cholesterol: 90mg
Ingredient Notes
- Pasta: Fresh pasta works best for this dish, as it offers a tender texture. If using dried, go for high-quality spaghetti or fettuccine that cooks al dente.
- Fresh peas: Sweet, tender peas are a must! Choose vibrant green peas with a firm texture. If unavailable, frozen peas are a good substitute, just thaw them first.
- Garlic: Fresh garlic provides a rich flavor base. Look for firm, plump cloves. Avoid pre-minced options, as they lose freshness quickly and may alter the taste.
- Herbs: Fresh mint is essential for a bright flavor! Pick vibrant green leaves without any brown spots. If fresh isn’t available, dried mint can work in a pinch.
- Parmesan cheese: Freshly grated Parmesan enhances richness and umami. Choose a good-quality block for grating yourself, which melts beautifully and avoids preservatives.
- Lemon: Use a zesty, juicy lemon for brightness. Look for firm lemons with a bright yellow skin, which indicates ripeness. Fresh lemon juice packs a flavor punch!
- Olive oil: Extra virgin olive oil adds depth and helps to bring all the flavors together. Choose a good-quality oil for best results. Avoid refined oils that lack flavor.
Recipe Tips
- If you notice your peas are overcooked, remove them from boiling water immediately after 2 minutes to stop the cooking process with cold water or ice.
- When pasta sticks together, add a splash of olive oil during cooking, roughly 1 tablespoon, to keep it separate and maintain texture.
- If your sauce feels too thick, gradually add pasta water, about ¼ cup at a time, while stirring until the desired consistency is achieved.
- For uneven seasoning, taste frequently while cooking and gradually add salt and pepper to your preference, rather than all at once.
- If your burrata is uncooperative while mixing, cut it into smaller pieces and gently fold it in to distribute its creamy richness throughout the pasta.
Serving Suggestions
Serve spring pea pasta with a side of gluten-free garlic bread or lemon arugula salad. You might also enjoy it alongside roasted asparagus or zucchini noodles.
Add to a spring vegetable medley or use to create a hearty pea and lemon soup. You can also make a vibrant pasta salad with cherry tomatoes and fresh basil.
Top with extra burrata for richness or a sprinkle of crushed red pepper flakes for heat. A drizzle of lemon-infused olive oil enhances flavor before serving.
Recipe variations
- You can use frozen peas (10 ounces) or sugar snap peas (½ cup) as the main pea ingredient for fresh spring flavor in the pasta sauce.
- Add garlic (2 cloves) and red pepper flakes (¼ teaspoon) to the olive oil (2 tablespoons) for a spicy, aromatic base before mixing with the peas.
- Either fresh burrata cheese (6 ounces) or parmesan cheese (⅓ cup) can be used to finish the pasta with creamy or nutty notes.
- If using this recipe for a larger group, increase pasta to 20 ounces and peas to 20 ounces; adjust lemon juice (2) and cheese accordingly for taste.
Save This Recipe!
How to Store?
To keep your spring pea pasta fresh and delicious, follow these storage tips:
Room Temperature: Store in an airtight container at room temperature for up to 1 day to maintain texture and flavor without spoilage.
Refrigeration: Place in an airtight container in the refrigerator for up to 3 days. Consume chilled or gently reheat on low heat.
Freezing: Transfer to a freezer-safe container or freezer bag, freeze for up to 2 months. Thaw overnight in the refrigerator before reheating.
Other Recipes You’ll Love
If you enjoyed this spring pasta or any other recipe on my blog, please leave a ⭐ star rating and let me know how it went in the comments below. I appreciate taking time to read about this recipe, thank you!