Description
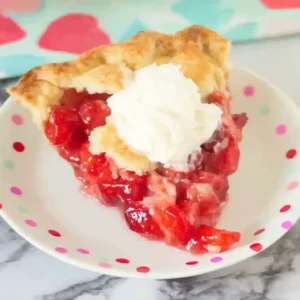
This Strawberry Glaze Pie is a delightful dessert featuring fresh strawberries and a rich glaze without using Jell-O.
Ingredients
Scale
- 1 pre-baked 9 inch pie crust, deep dish
- 5 cups fresh strawberries, divided
- 1 cup water
- 3/4 cup sugar
- 3 tablespoons cornstarch
- Tiny knife tip of red food coloring gel, optional
- Whipped cream, optional
Instructions
- Prep & Heat Mix: Start by heating your saucepan over medium heat. Toss in the sugar and cornstarch, mixing them until it looks smooth and well-combined. This step is crucial for creating a nice, thick glaze. Be careful to keep stirring so nothing sticks or burns.
- Whisk & Add Strawberries: Whisk in the water until you see that lovely, glossy mixture forming. Now, toss in the sliced strawberries and let them heat up a bit. Stir gently so the strawberries do not break apart too much. If they look mushy at this point, ensure the ones you used were firm to start with!
- Simmer & Watch Closely: Let the mixture simmer for a few minutes while continuing to stir. You want to see it bubbling gently but not boiling vigorously, which can lead to overly soft strawberries. Keep an eye on it; if it starts getting too thick too quickly, lower the heat.
- Cool & Thicken: Once you notice the glaze has thickened, take it off the heat and let it cool for a bit. Once it is cooled to room temperature, it should continue to thicken more. Resist the urge to skip this cooling step, or you might end up with a runny glaze.
- Brush & Fill Crust: Grab your pre-baked crust and carefully brush a bit of the cooled glaze inside. This step creates a little barrier to prevent a soggy crust. When it looks shiny and a bit sticky, you are ready to fill it with the remaining glaze mixture.
- Chill & Enjoy Together: Place the pie in the fridge for a couple of hours to set completely. You want that glaze to be nice and firm when you are ready to slice it. If you cannot wait and cut it too soon, you might end up with a messy pie instead of those neat slices everyone loves.
Notes
- Store the pie in a sealed container, refrigerated, for up to 3 days.
- If the glaze is not thickening, double-check that you fully whisked the cornstarch with the sugar and maintain medium heat while stirring continuously.
- When using strawberries, opt for firm, ripe ones to prevent them from becoming mushy after chilling. Overcooking during glaze prep also affects texture.
- For a droopy pie crust, brushing a thin layer of glaze on the bottom before filling can help create a moisture barrier.
- This recipe does not require reheating, as it is best served cold.
- Serve with a dollop of whipped cream or pair with vanilla ice cream. Garnish with fresh mint leaves for added flair.
- Add a layer of dark chocolate ganache under the strawberries or use a graham cracker crust instead of a pastry crust. Incorporate other berries like blueberries or raspberries for a mixed berry glaze.
- Choose firm, ripe strawberries for the best flavor and texture. Avoid overripe strawberries, as they may break apart during cooking. If cornstarch is unavailable, consider using arrowroot powder as an alternative thickener in the same quantity.
Nutrition
- Serving Size: 1 slice