
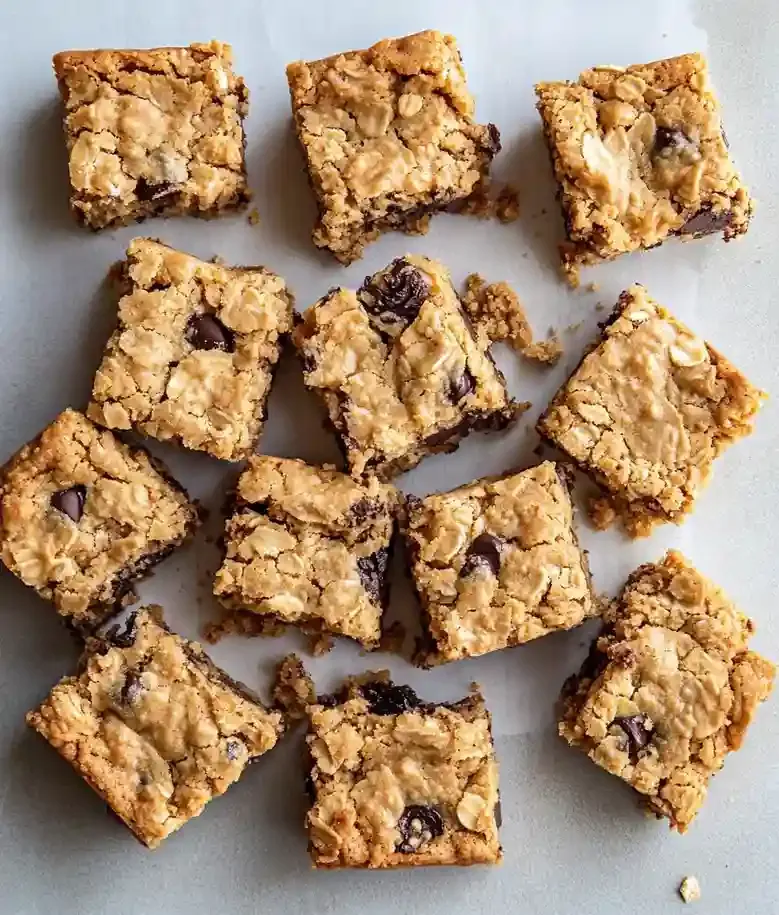
You’re going to love these peanut butter oatmeal bars! They are rich and chewy while being super easy to whip up. With just a few basic pantry ingredients, you’ll have a tasty treat that’s perfect for snacks or desserts.
This recipe fixes dry bars, crumbly texture, and overly sweet treats by using oats, peanut butter, and controlled moisture for sturdy, chewy bars.
Sometimes, I find it tricky to come up with sweet snacks that fit my dietary needs. These bars solve that problem! They’re yummy enough to satisfy cravings without causing any worries for those of us with diabetes or gluten allergies in the family.
This easy recipe takes just 10 minutes to prep and about 20 minutes to bake. You can enjoy them within an hour and a half! Plus, you can customize them based on what you have in your kitchen. Want to throw in some chocolate chips or nuts? Go right ahead!
If you love snacks that are quick and easy, give these a try. If you want something fun to bake, you might also enjoy Oatmeal Raisin Cookie Bars. They’re a great option too!
Why You Will Love This Recipe
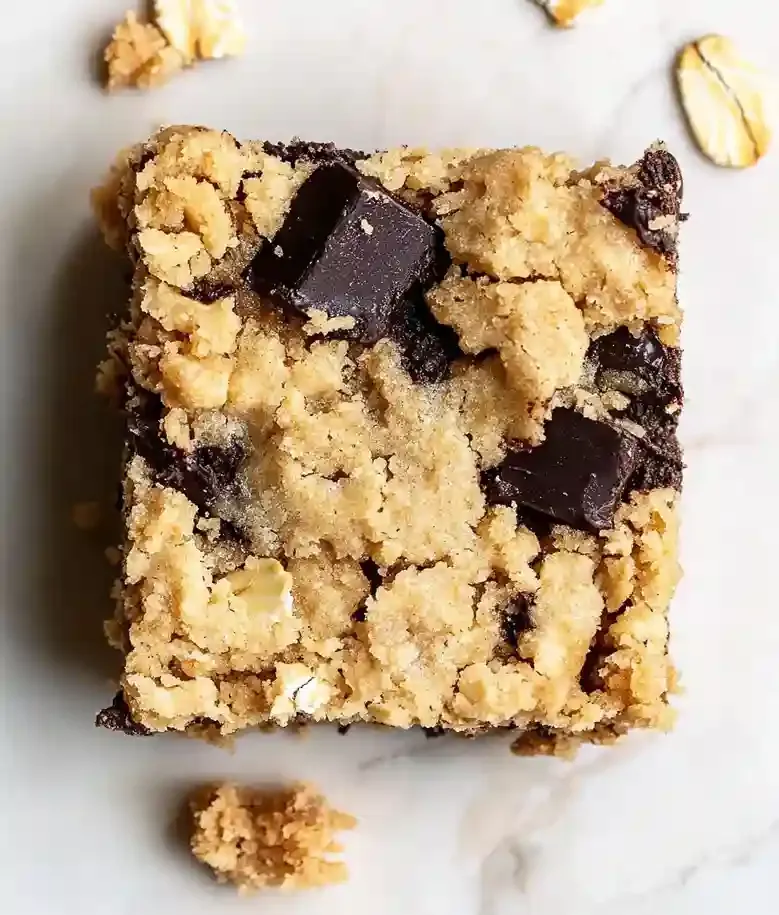
- Great Texture : The chewy oats give these bars a satisfying bite that you’ll crave again and again. It’s a nice change from your typical snack bars.
- Rich Flavor : Creamy peanut butter adds a nutty sweetness that pairs perfectly with just about any add-in. You can customize it to your taste.
- Convenient to Make : You can whip these up in no time, just mix, press, and bake. It’s an easy snack or dessert solution when you’re short on time.
- Easy Storage : These bars keep well in an airtight container at room temperature, or you can freeze them. You’ll always have a tasty treat on hand.
Soft Chewy Peanut Butter Oatmeal Bars
- Prep Time: 10 minutes
- Cool Time: 60 minutes
- Cook Time: 20 minutes
- Total Time: 90 minutes
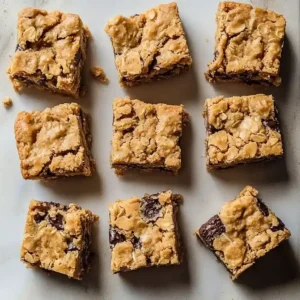
- Yield: 12 bars 1x
- Category: snack
- Method: baking
- Cuisine: American
- Diet: vegetarian
Description
Delicious and chewy peanut butter oatmeal bars that are easy to make and perfect for snacks.
Ingredients
- 1 cup (120 g) all purpose flour, sifted
- 1 cup (86 g) old fashioned oats
- 1/21/2 teaspoon baking soda
- 1/41/2 teaspoon salt
- 1/2 cup (113 g) unsalted butter, softened
- 1/2 cup (100 g) light brown sugar, packed
- 1/2 cup (100 g) granulated sugar
- 3/4 cup (192 g) creamy peanut butter
- 1 large egg, room temperature
- 11/2 teaspoon vanilla extract
- 1 cup (170 g) chocolate chips, optional
- 1/21/2 teaspoon baking soda
- 1/41/2 teaspoon salt
Instructions
- Mix Wet & Dry Ingredients: Start by blending together the wet ingredients until they are nice and smooth. You will want an inviting aroma of peanut butter and sweetness filling your kitchen. This step is crucial because it creates a cohesive texture in your bars. Just remember, if you overmix, the bars might turn out tough, so keep it gentle.
- Fold in Oats & Flavorings: Gently fold in the oats and any mix-ins, like nuts or chocolate chips, until just combined. You will see all those rolled oats soaking up the peanut butter goodness, making it feel so hearty. This gives your bars that satisfying chewiness. Avoid stirring too vigorously, as it can break down the oats.
- Pour into Baking Dish: Transfer the mixture into a greased baking dish, spreading it out evenly. The batter should already look thick and chunky, like it is ready to be baked. Spreading it evenly ensures all parts cook at the same rate. If it looks too sparse in some areas, your bars might end up unevenly baked, and nobody wants that!
- Bake & Watch the Clock: Pop the dish into the oven and let them bake until golden brown. That lovely nutty aroma will start wafting through your space around the halfway mark. This is where the bars firm up and start to develop their texture. But keep an eye on them; burning can easily happen if you walk away.
- Cool Completely & Slice: Once they are done, let the bars cool down entirely in the pan. You will notice the top setting and becoming firm as it cools. This wait is essential because slicing them too soon might lead to a crumbly mess. Patience pays off and gives you those perfect squares to enjoy.
Notes
- Storage Tips: Store the peanut butter chocolate oatmeal bars in an airtight container. Store at room temperature for up to 5 days. For longer storage, freeze the bars for up to 2 months.
- Expert Tips: Bring cold ingredients to room temperature before mixing. Use a metal pan for better results. Look for a light golden brown color to indicate doneness.
- Troubleshooting: If the bars are too crumbly after baking, ensure the butter is creamed well and that the dry ingredients are mixed in properly. When the bars feel sticky and hard to cut, let them cool completely before attempting to cut. If the bars did not rise properly, ensure your baking soda is fresh and check the oven temperature.
- Serving Suggestions: Serve warm with a drizzle of peanut butter. Pair with a scoop of vanilla ice cream. Enjoy with a cup of coffee or tea.
- Recipe Variations: Add nuts like walnuts or pecans for crunch. Substitute cocoa powder for a chocolatey twist. Add dried fruits for extra chewiness.
- Ingredient Notes: Use gluten free flour or oat flour as a substitute for all purpose flour (replace based on weight of 120 g rather than cups). If using salted butter, omit added salt. Maple sugar can replace granulated sugar and light brown sugar, making the bars refined sugar-free. Milk chocolate or dark chocolate can be used instead of semi-sweet chocolate chips or omit if desired.
Nutrition
- Serving Size: 1 bar
- Calories: 350
- Sugar: 1g
- Sodium: 600mg
- Fat: 20g
- Saturated Fat: 7g
- Unsaturated Fat: 10g
- Trans Fat: 0g
- Carbohydrates: 15g
- Fiber: 1g
- Protein: 30g
- Cholesterol: 90mg
Recipe Tips
- If you’re finding your bars too crumbly, softening the butter really well and mixing the dry ingredients thoroughly can help create the right texture.
- When the bars feel sticky and challenging to slice, waiting for them to cool completely can make cutting much easier.
- If you’re unsure whether your bars have risen properly, checking the freshness of your baking soda and verifying the oven temperature can address the issue.
- For a less dry outcome, adjusting the baking time slightly might just do the trick, ensuring that the bars stay chewy.
- If your pan isn’t metal, switching to one can significantly improve how the bars bake, so consider the material for a better result.
Serving Suggestions
Serve these peanut butter oatmeal bars warm with a drizzle of extra peanut butter on top. Pair them with a scoop of vanilla ice cream or enjoy with a cup of coffee or tea.
These bars fit well into snack time or dessert occasions like birthday parties and holiday gatherings. You can also enjoy them as an after-school treat for kids.
Add a drizzle of chocolate sauce for a sweet touch. Consider a sprinkle of cinnamon for added flavor before serving.
Recipe variations
- You can use almond flour instead of all-purpose flour for a nutty flavor and gluten-free option.
- Add ¼ cup cocoa powder to the mix for a rich chocolate flavor that complements the peanut butter beautifully.
- Either swap out the chocolate chips for dried cranberries or opt for 1 cup of chopped nuts like walnuts or pecans for extra crunch.
- If you want to double the batch, use 2 cups of all-purpose flour, 2 cups of oats, and scale all other ingredients accordingly.
Save This Recipe!
How to Store?
To keep your peanut butter oatmeal bars fresh, follow these storage tips:
Room Temperature: Store bars in an airtight container at room temperature for up to 5 days.
Refrigeration: For extended freshness, refrigerate the bars in an airtight container for up to 1 week.
Freezing: Wrap each bar in plastic wrap, then place in a freezer bag. Freeze for up to 2 months. Thaw at room temperature.
Other Recipes You’ll Love
If you enjoyed this peanut butter oatmeal bars or any other recipe on my blog, please leave a ⭐ star rating and let me know how it went in the comments below. I appreciate taking time to read about this recipe, thank you!