Description
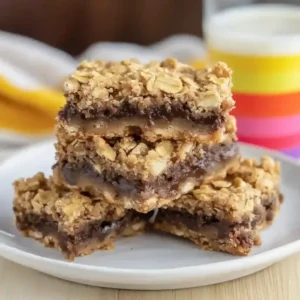
Delicious, chewy oatmeal fudge bars with a rich chocolate layer, perfect for any sweet tooth.
Ingredients
Scale
- 1 cup (227g) unsalted butter, softened
- 2 cups (400g) light brown sugar
- 2 whole eggs
- 21/2 teaspoons (10ml) vanilla extract
- 3 cups (270g) old fashioned oats
- 2 1/2 cups (312g) all-purpose flour
- 11/2 teaspoon (5g) baking soda
- 11/2 teaspoon (6g) salt
- 1 package (12 oz or 340g) semi-sweet chocolate chips
- 1 can (14 oz or 396g) sweetened condensed milk
- 2 tablespoons (28g) butter
- 11/2 teaspoon (6g) salt
- 11/2 teaspoon (5ml) vanilla extract
Instructions
- Prepare the Base Layer: Start by mixing your oats and other ingredients until it forms a cohesive dough. You will know it is ready when it looks slightly sticky and feels dense. This step is crucial for getting that chewy texture. Be careful not to overmix; otherwise, the bars might crumble later.
- Press Into Pan: Transfer the dough to a lined baking dish and use your fingers to press it down evenly. You want an even thickness, so every bite has that delicious base. If it feels too sticky, wet your hands slightly. Keep an eye on the edges to ensure they do not get too thin.
- Bake & Aromas Rise: Bake the base until it is golden brown and smells amazing—around 25 minutes should do it. This gives you that warm, comforting scent of toasted oats filling your kitchen. If it starts to look too dark, you might be at risk of burning, so stay close!
- Layer the Chocolate: Melt your chocolate and pour it over the baked base. Spread it out evenly, so every bite enjoys that chocolaty goodness. You will know it is ready when it bubbles slightly and has a glossy appearance. Do not rush this step; pouring too fast might end up with pools instead of a smooth layer.
- Chill & Set: Place the dish in the refrigerator and let it chill until everything is set, around 60 minutes. You will see the chocolate firming up and becoming a nice topping for your bars. Avoid slicing too soon; if you do, it might break apart.
Notes
- Storage Tips: Cover the baking dish with foil or a tight-fitting lid; it will last 3-4 days at room temperature.
- Expert Tips: Let the bars cool completely before slicing for cleaner cuts.
- For easier removal from the baking dish, lining it with parchment paper can save you hassle.
- When mixing ingredients, ensure everything is well combined to prevent the cookie dough from drying out.
Nutrition
- Serving Size: 1 bar
- Calories: 241
- Sugar: 17g
- Sodium: 328mg
- Fat: 10g
- Saturated Fat: 6g
- Unsaturated Fat: 0g
- Trans Fat: 0g
- Carbohydrates: 34g
- Fiber: 1g
- Protein: 4g
- Cholesterol: 39mg