Description
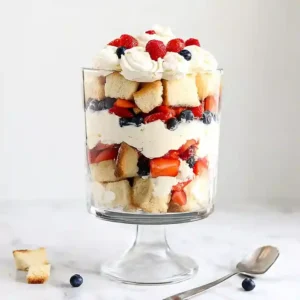
A delightful no-bake cheesecake berry trifle made with layers of cream cheese, whipped cream, and fresh berries.
Ingredients
Scale
- 1 loaf (1 9×5 inch) pound cake, cut into 1-inch cubes
- 1 (8-ounce) brick full-fat cream cheese, softened to room temperature
- 1/21/2 teaspoon vanilla extract
- 2 1/4 cups whipped cream
- 5 cups fresh mixed berries, sliced
- 2 1/2 cups heavy whipping cream
- 1/4 cup powdered sugar
- 11/2 teaspoon vanilla extract
- 1/21/2 teaspoon vanilla extract
Instructions
- Mix the Cheesecake Filling: Start by mixing your cream cheese, powdered sugar, and 1/21/2 teaspoon vanilla extract until it is totally smooth and creamy. Ensure the mixture is free of lumps for that luscious mouthfeel. It is important to not rush this step to avoid a chunky texture.
- Whip the Cream: Next, whip 2 1/2 cups heavy whipping cream until firm peaks form. The mixture should look light and fluffy, filling your kitchen with a sweet aroma. Do not stop too early, as this is essential for stabilization. Avoid overmixing, as it can turn grainy.
- Fold It All Together: Gently fold the whipped cream into the cheesecake mixture using a spatula, making sure to keep the texture nice and airy. Be careful not to mix too aggressively, as this can deflate the cream and spoil the fluffiness.
- Prepare the Trifle Dish: Grab your trifle dish and start layering! Begin with a layer of the cheesecake mixture, followed by a layer of sliced fresh mixed berries. Ensure even distribution of the layers to avoid uneven bites.
- Chill It Out: Pop the assembled trifle in the fridge for at least two hours. This step allows all the flavors to meld together. Skipping this step may result in layers that are too wobbly when served.
- Serve and Enjoy: When ready to serve, take it out of the fridge and consider adding a few extra fresh berries on top for garnish. Serve it chilled for the best experience, and be careful when scooping to keep the layers intact.
Notes
- Storage Tips: Cover and store leftovers in the refrigerator for up to 3 days.
- Expert Tips: For a denser cheesecake filling, chilling it for 30 minutes before layering will create a firmer texture. Assemble the trifle up to a day ahead to enhance overall flavor without sacrificing freshness.
- Reheating Instructions: No reheating is necessary. Serve straight from the refrigerator.
- Serving Suggestions: Serve with a sprig of mint for freshness. Accompany with a side of chocolate sauce or pair with a scoop of vanilla ice cream for extra indulgence.
- Recipe Variations: If needed, substitute pound cake with angel food cake, either homemade or store-bought. For whipped cream, you may also use Cool Whip, but add it just before serving to maintain texture.
- Ingredient Notes: When using frozen berries, thaw and drain them thoroughly to prevent excess liquid in the trifle. Ensure all ingredients are fresh, particularly the cream cheese and whipping cream, for optimal flavor and texture.
Nutrition
- Serving Size: 1 serving
- Calories: 334
- Sugar: 21g
- Sodium: 303mg
- Fat: 22g
- Saturated Fat: 13g
- Unsaturated Fat: 0g
- Trans Fat: 0g
- Carbohydrates: 30g
- Fiber: 2g
- Protein: 6g
- Cholesterol: 92mg