Description
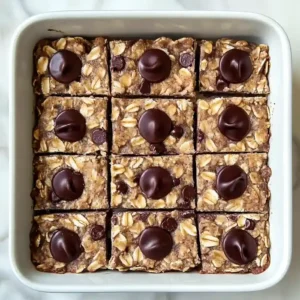
Delicious vegan and gluten-free baked oatmeal bars, perfect for a quick snack or breakfast.
Ingredients
Scale
- 2 cups (160g) rolled oats
- 1 1/3 cup (320g) mashed banana
- 6 tbsp (90ml) water
- 1/2 tsp salt
- 3 tbsp (45ml) pure maple syrup, agave, or honey OR stevia equivalent
- 3 tbsp (45ml) oil, nut butter, or additional water
- 1 tsp (5ml) pure vanilla extract
- optional handful chocolate chips, chopped nuts, etc.
Instructions
- Mix the Base: Start by mixing your dry ingredients in a big bowl. As you stir, the oats, cinnamon, and baking powder will blend nicely, creating a warm, comforting aroma. Make sure there are no clumps; those can lead to uneven baking. A common mistake is not mixing well enough, leading to spots of dryness.
- Add Wet Ingredients: Next, stir in the mashed bananas and your choice of milk until everything’s coated. The mixture should feel moist but not runny. This is where the magic happens, and the flavors meld together. Just remember, if it seems too dry to incorporate everything, it might need a splash more liquid.
- Fold In Mix-ins: Gently fold in any extras, like nuts or chocolate chips, until they’re evenly spread through the mixture. The added textures and scents will guide you, creating a delightful medley in your bowl. Just be careful not to overmix; you want those goodies to stay whole.
- Transfer to Baking Dish: Pour the mixture into a lined baking dish and spread it evenly. As you do this, you’ll notice it thickening up—this is a good sign. If you skip the lining step, you might end up with a sticky mess.
- Bake Until Set: Place the dish in the oven and let it bake until it’s set but still slightly soft to the touch. You’ll know it’s done when the edges begin to pull away from the sides, and it smells heavenly. Trust your instincts on doneness; overbaking can make the bars tough.
- Cool and Slice: Once baked, let the bars cool in the dish for a while before moving them to a cooling rack. This helps prevent crumbling when you slice them. If you don’t let them cool enough, you might end up with a messy cut!
Notes
- Cover and refrigerate leftovers for 3-4 days or slice and freeze for up to 3 months with parchment paper between layers.
- Do not open the oven door while baking.
- Let the bars sit in the closed oven for an additional five minutes after baking.
- If the bars turn out too dry, avoid overbaking and add more banana or nut butter to create a softer texture.
- For crumbly bars, consider adding a little water or nut butter to the mixture for improved moisture and cohesion.
- If the bars stick to the pan, ensure proper lining with parchment paper or greasing the pan well before pouring in the mixture.
Nutrition
- Serving Size: 1 bar
- Calories: 0
- Sugar: 0
- Sodium: 0
- Fat: 0
- Saturated Fat: 0
- Unsaturated Fat: 0
- Trans Fat: 0
- Carbohydrates: 0
- Fiber: 0
- Protein: 0
- Cholesterol: 0