
This baked tilapia recipe is a go-to for anyone who wants a delicious, quick dinner. With zesty lemon and garlic, you’ll have a warm, flavorful dish ready in no time, perfect for busy weeknights or unexpected guests.
This recipe resolves issues like bland flavors and dry fish that home cooks often encounter while preparing tilapia dishes.
I know it can be tricky to get fish just right without it turning dry or bland. I’ve had my fair share of dry fish disasters in the past, but I found this method works wonders. The combo of butter, lemon, and garlic gives the tilapia a burst of flavor that doesn’t overpower its delicate taste.
The beauty of this recipe is that it only takes 15 minutes from start to finish. You simply preheat the oven, pop the seasoned fish in, and voila! You’ll enjoy a tender and tasty meal that feels fancy without keeping you in the kitchen for hours.
If you love easy fish dishes, try my Oven Baked Shrimps that’s just as simple and equally satisfying.
Table of contents
Why You Will Love This Recipe
- Delicate Texture , The tilapia fillets bake up tender and flaky, creating a satisfying mouthfeel that pairs beautifully with the zesty lemon and garlic.
- Bright, Fresh Flavor , Fresh lemon juice and garlic come together to create a flavor profile that’s both refreshing and vibrant, ensuring every bite is a burst of goodness.
- Quick and Easy Meal , With just 15 minutes from start to finish, this dish is a lifesaver for busy weeknights when time is tight but a tasty dinner is still desired.
- Versatile Pairings , This baked tilapia holds its own beside a variety of sides, making it a flexible option for mixing in with your favorite seasonal vegetables or grains.
Lemon Garlic Baked Tilapia Dinner
- Prep Time: 5 minutes
- Cool Time:
- Cook Time: 10 minutes
- Total Time: 15 minutes
- Yield: 4 servings 1x
- Category: Main Course
- Method: Baking
- Cuisine: American
- Diet: Low Fat
Description
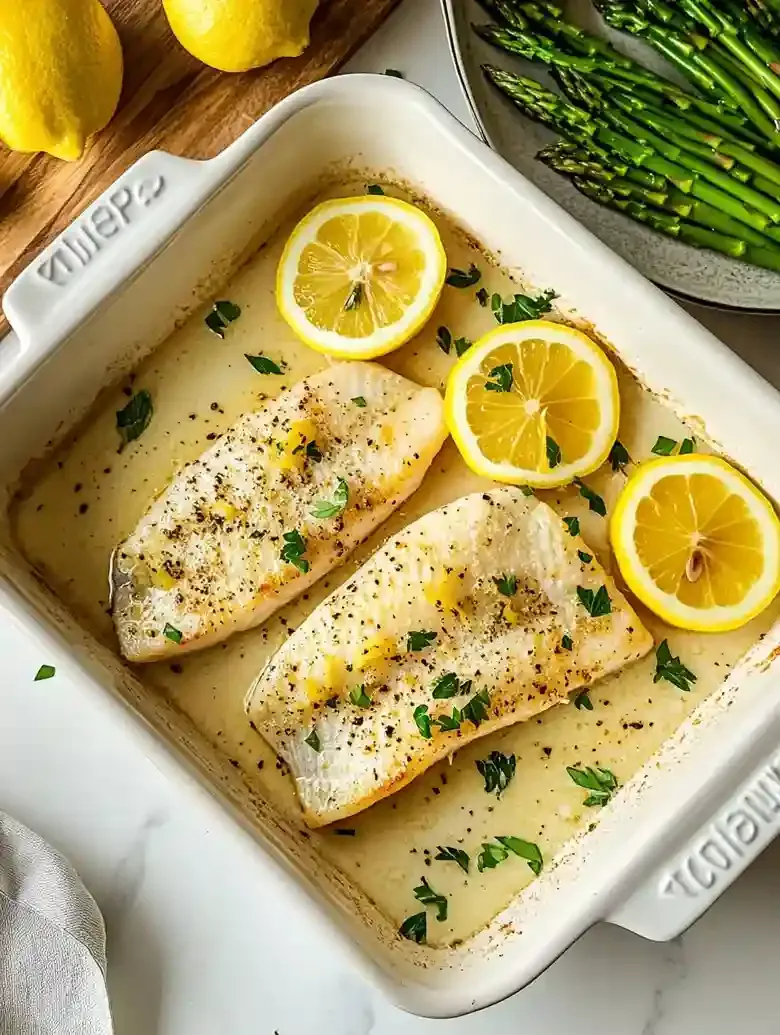
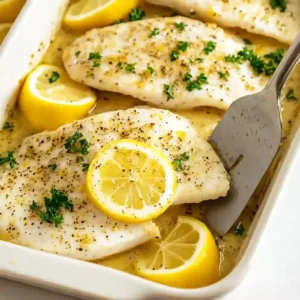
Baked Lemon Pepper Tilapia , a quick low-fat baked fish seasoned with lemon, garlic, butter, and parsley.
Ingredients
-
- 4 (4 fillets) (approx. 1 lb/450 g) tilapia fillets, fresh and translucent
- 2 tablespoons (30 ml) butter, melted
- 2 cloves garlic, minced
- 2 tablespoons (30 ml) fresh lemon juice
- 1 lemon, thinly sliced
- 2 tablespoons (8 g) fresh parsley, chopped
- Salt, to taste
- Black pepper, to taste
- No additional seasonings beyond salt and pepper specified
Instructions
- Step 1: Preheat Oven: Set oven temperature to 400°F (200°C). This temperature will bake the tilapia evenly and help the fish retain moisture for tender, flaky fillets.

- Step 2: Arrange and Season: Place the tilapia fillets in a single layer in the baking dish. Lightly season each fillet with salt and black pepper, distributing evenly to ensure balanced flavor in every bite.
- Step 3: Mix and Drizzle: In a small bowl, whisk the melted butter with minced garlic and fresh lemon juice. Drizzle this mixture evenly over each fillet to impart bright citrus notes and savory richness from the butter and garlic.
- Step 4: Add Lemon & Parsley: Lay thin slices of lemon on top of the fish fillets, then sprinkle chopped fresh parsley over everything. These additions provide aromatic freshness and a pop of color.
- Step 5: Bake and Check: Bake the fish in the preheated oven for 10 minutes. Check at 10 minutes by gently flaking the thickest part of a fillet with a fork. When the fish flakes easily, it is done. Avoid overcooking to keep the tilapia moist and tender.

Notes
-
- Room Temperature: Store baked tilapia in an airtight container on the counter up to 1 day, avoiding direct heat and sunlight.
- Refrigeration: Seal baked tilapia in an airtight container; refrigerate at or below 40°F (4°C) for up to 3 days. It can be consumed cold or gently reheated.
- Freezing: Wrap fillets tightly with plastic wrap and place in a freezer-safe container. Freeze at 0°F (-18°C) for up to 2 months. Thaw overnight in the refrigerator before reheating.
- To prevent uneven cooking, arrange fillets in a single layer with space between them.
- Lightly butter or spray the baking dish to prevent the fish from sticking.
- Check for flakiness starting at 10 minutes to avoid drying out the fish.
- If flavor tastes weak, sprinkle extra salt and pepper before baking.
- For a brighter lemon punch, add an additional teaspoon of lemon juice right after baking.
- Gently reheat refrigerated tilapia in a 300°F (150°C) oven for 9 minutes or until warmed through without drying out.
- Serving Suggestions: Serve alongside sautéed asparagus, mixed green salad, roasted sweet potatoes, or garlic mashed cauliflower. Baked tilapia can also be added to tacos, grain bowls, or tossed into salads and roasted vegetable dishes. Top with tartar sauce, zesty lemon sauce, or fresh herbs like dill or parsley for added flavor.
- Recipe Variations: Add paprika (sweet or smoked) for subtle warmth and color without overpowering the fish.
- Recipe Variations: Substitute fresh garlic with jarred minced garlic if pressed for time, though fresh is preferred.
- Ingredient Notes: Choose fresh tilapia fillets that have translucent flesh and no odor for best texture and flavor absorption.
- Ingredient Notes: Use freshly squeezed lemon juice for vibrant acidity; bottled lemon juice does not provide the same flavor brightness.
- Ingredient Notes: Finely chop garlic instead of crushing to prevent burning during baking.
- Ingredient Notes: Use extra virgin olive oil if desired to add richness and moisture, though butter is used in the recipe.
- Ingredient Notes: Select bright green fresh parsley for noticeable flavor impact.
Nutrition
- Serving Size: 1 fillet
- Calories: Not specified
- Sugar: Not specified
- Sodium: Not specified
- Fat: Not specified
- Saturated Fat: Not specified
- Unsaturated Fat: Not specified
- Trans Fat: Not specified
- Carbohydrates: Not specified
- Fiber: Not specified
- Protein: Not specified
- Cholesterol: Not specified

Ingredient Notes
- Tilapia filets: Choose fresh-looking tilapia with translucent flesh and no odor. It cooks up flaky and absorbs flavors beautifully!
- Lemon juice: Freshly squeezed lemon juice works best! It brightens the dish with acidity, balancing the flavors perfectly. Bottled versions lack the same zing.
- Garlic: Use fresh garlic and finely chop it rather than crushing, as this prevents burning when baked. The aroma elevates the entire dish!
- Olive oil: A good quality olive oil adds richness and helps with moisture. Look for extra virgin for the best flavor impact when drizzled on the fish.
- Paprika: Use sweet or smoked paprika for a touch of warmth and color. It’s a simple way to enhance the flavor without overpowering the tilapia.
- Parsley: Fresh parsley brightens up the dish with a pop of color. Make sure it’s vibrant green, as fresher herbs make a noticeable difference in taste!
Recipe Tips
- If tilapia isn’t cooking evenly, arrange the fillets in a single layer and leave space between them on the baking dish.
- When fish sticks to the baking dish, lightly coat the dish with cooking spray or a thin layer of butter before placing the fillets.
- If you’re unsure about doneness, check the fish for flakiness after 10 minutes of baking using a fork to avoid overcooking.
- When flavors lack depth, sprinkle a pinch of salt and pepper over the fillets before baking to boost overall taste.
- If the lemon flavor is too mild, add an extra teaspoon of lemon juice over the fish right after baking for brightness.
Serving Suggestions
Serve baked tilapia with sautéed asparagus or a mixed green salad. Roasted sweet potatoes or garlic mashed cauliflower also make excellent accompaniments.
Add baked tilapia to tacos or grain bowls for an exciting twist. Toss it into a salad or combine with roasted vegetables for a filling dish.
Top baked tilapia with tartar sauce or a zesty lemon sauce for brightness. Consider fresh herbs like dill or parsley for a finishing touch.
Recipe variations
- You can use cod or tilapia fillets in this baked fish recipe. Cod offers a firmer texture but maintains a mild flavor similar to tilapia for baking.
- Add 2 tablespoons of melted butter combined with 2 minced garlic cloves and 2 tablespoons of lemon juice to drizzle over the fish for vibrant citrus and garlic notes.
- Either fresh or bottled lemon juice can be used, though fresh juice provides a brighter acidity. You can refer to Lemon Garlic Shrimp Pasta for a complementary lemon-garlic protein dish.
- If preparing for more than 4 servings, scale up the fish fillets by multiples of 4 and increase melted butter and lemon juice by 2 tablespoons per 4 fillets to maintain flavor balance.
Save This Recipe!
How to Store?
To keep your Lemon Garlic Baked Tilapia Dinner fresh and delicious, follow these storage tips:
Room Temperature: Place in an airtight container; store on the counter up to 1 day. Avoid heat and direct sunlight.
Refrigeration: Seal in an airtight container; refrigerate at or below 40°F for up to 3 days. Consume cold or reheat gently.
Freezing: Wrap fillets with plastic wrap, place in a freezer container; freeze at 0°F up to 2 months. Thaw overnight in refrigerator.
Other Recipes You’ll Love
If you enjoyed this baked tilapia or any other recipe on my blog, please leave a ⭐ star rating and let me know how it went in the comments below. I appreciate taking time to read about this recipe, thank you!